Adjusting them is a pretty straightforward process when it comes to bike brakes. However, it’s essential to make sure that they’re adjusted adequately before heading out on the road. Here’s a quick guide on how to adjust bike brakes.
Things You Need to Know About This Tutorial
Bicycle Brake Systems: What do you know?
Modern bicycles can be equipped with three primary brake systems: disc brake, caliper, or V-brake.
Caliper brakes need a cable to be activated. This brake type can be found on road bikes.
V-brakes can be compared to caliper brakes in that they require activation via cable action. These brakes are very popular with mountain bikers, especially those equipped with suspension systems.
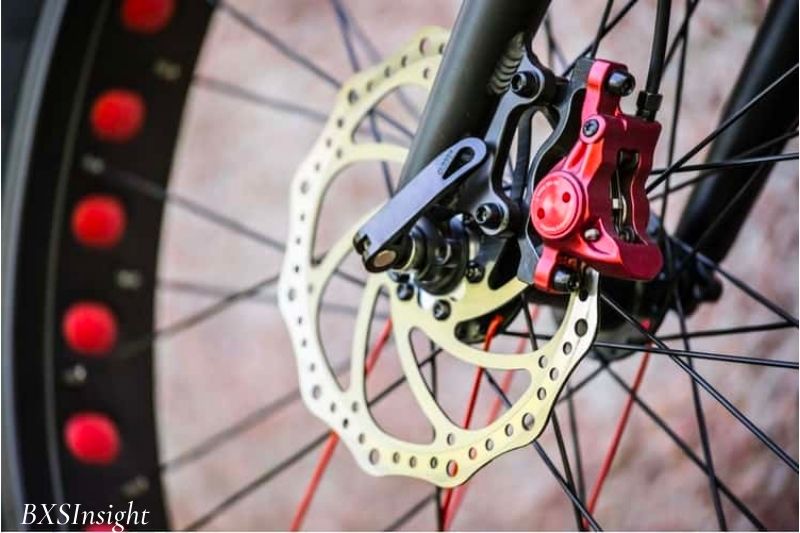
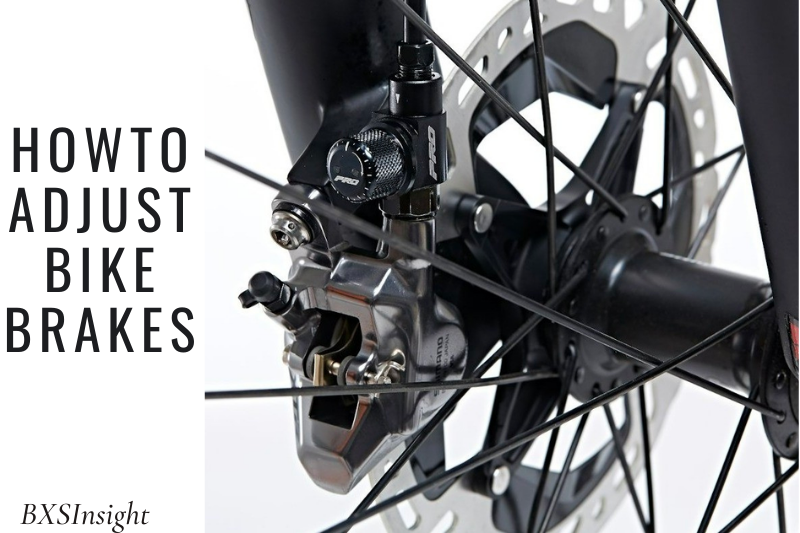
Disc brakes work in the same way as modern motorcycle and car brakes. The brake system is composed of a rotor (or caliper) and a piston that compresses the disc (or rotor) to slow the bike down or stop it. This brake system is available on hybrid, touring, off-road, and hybrid bikes.
Brake Adjusting Tools
This project will require several tools, including a pair of pliers, a spanner, a ring wrench, and Allen keys.
Depending on the specifications of your bike’s fasteners, you may need additional tools. Some bikers also recommend Anti-seize grease to enhance the performance of threaded parts.
How To Adjust Bike Brakes?
Method 1: Adjusting your Brake Pads
1. Before you make any adjustments, check your brake pads. Brake pads are the ones that hold the front tire to your bike’s wheels when you pull the lever. If worn beyond the “wear line” line, you will need to replace the brake pads.
If your brake pads’ wear lines aren’t marked, you should keep them with grooves on the pads.
You can either order new brake pads online or pick them up at your local bike shop.
Also, ensure your wheel is aligned correctly in the dropouts. If it doesn’t, your brakes won’t be in contact.
2. Squeeze the brake lever to check where the pads are hitting the rim. The front tire’s rim should have both brake pads in contact. The pads should touch the rim in the middle, leaving a space between the pad and the tire. The pads that connect the rim too low or high could cause them to contact the rubber or spokes of the bike.
As you squeeze the brake lever, crouch down to see the pads.
Check that your bike’s quick-release mechanism is not loosening or damaged. If it isn’t tightened tightly, the brakes will not work.
3. Use an Allen wrench to loosen the brake pads’ bolts in place. To loosen the bolts, turn the Allen wrench counterclockwise. It would help if you did not loosen all bolts, or your brake pads may come off the brake pad holder.
4. The brake pads can be moved up and down in the brake pad holder. Once the bolts have been removed, they should be able to move up or down. If they were too low to the rim, you could move them up until the center. If they were too high, lower them until they are centered.
5. The Allen wrench can be used to tighten the brake pad bolts. Continue turning the Allen wrench counterclockwise until all bolts are tightened. Make sure that the brake pads are correctly aligned. If necessary, adjust.
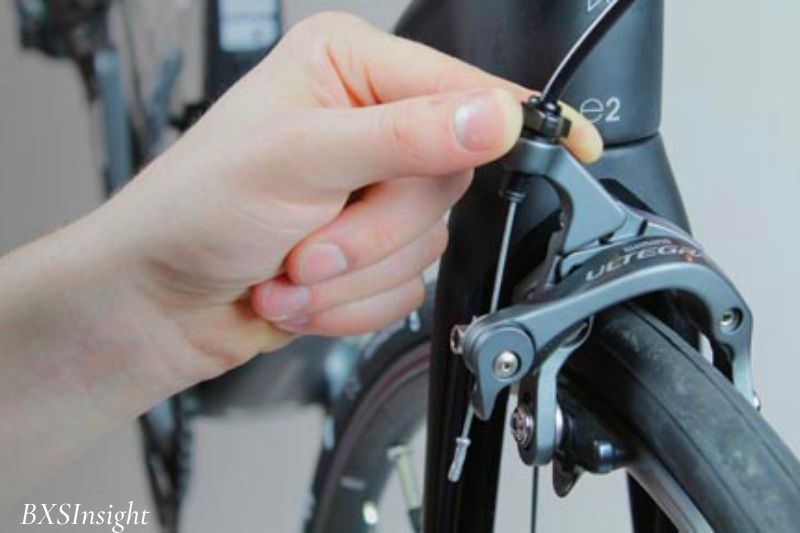
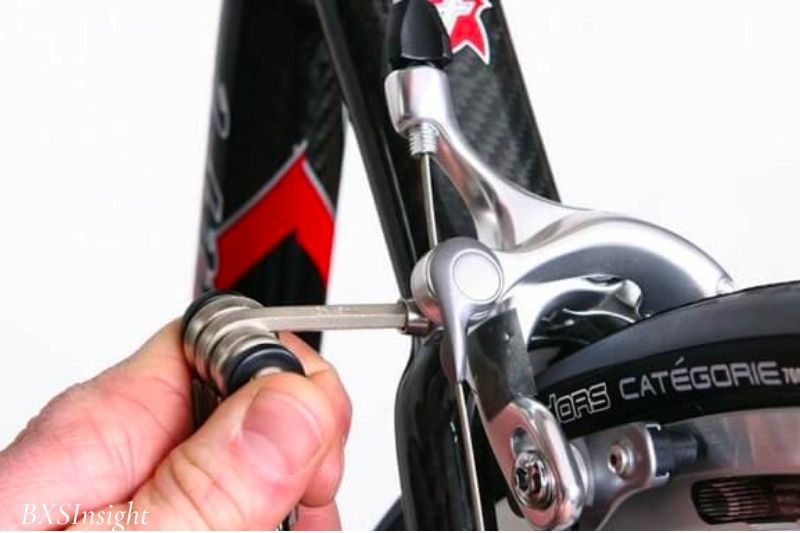
Method 2: Tightening Your Brake Cables
1. Pull each brake lever to check the tightness. The brake levers should be approximately 1 1/2 inches (3.8 cm) from the grip of the handlebars when you pull them. The brake cables may be too loose if the levers touch the handlebars as you pull them.
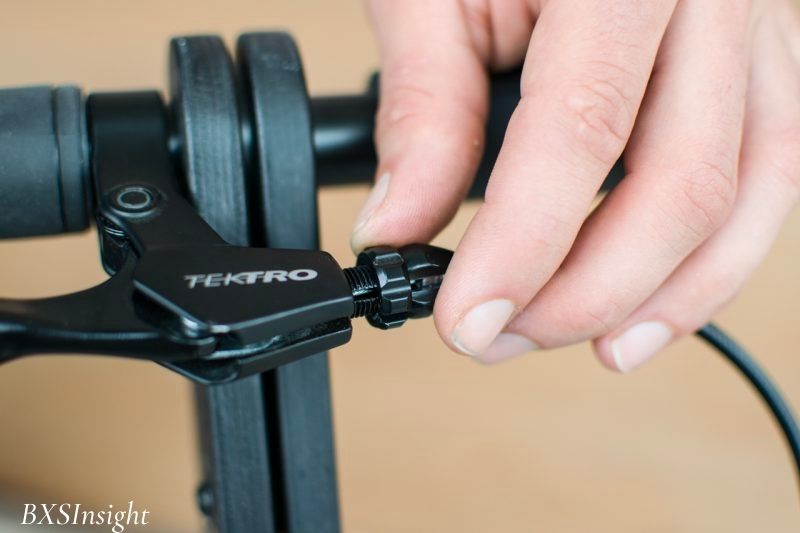
2. For minor adjustments to brake cables, loosen the barrel adjusters. The barrel adjusters can be loosened if your brake cables are slightly loose. The barrel adjusters can be found where the brake cables meet with the brake levers.
Turn the barrel adjuster counterclockwise to loosen the brake cable. The brake cable will be slightly tightened if the barrel adjuster is loosened.
Loosen the barrel adjuster and pull the brake lever to check if the problem is solved. If the brake cable is still too loose, you will need to adjust the caliper. The barrel adjuster can be left as is. Do not tighten it.
3. Remove the bolt that holds the brake cable to the caliper. The mainframe of brakes to which the brake pads are attached is the caliper. The brake cable is the short cable that extends from the caliper. Locate the bolt holding the brake cable. Turn it clockwise with an Allen wrench until it is loosening slightly.
Do not remove the bolt altogether. Turn the Allen wrench counterclockwise 2 to 3 times until you loosen the bolt.
4. To tighten the brake cable, pull it outward. Once the bolt has been loosening, it should be easy to pull the cable. Hold it in place once you have pulled the cable taut using your fingers.
The brake pads should be tightened on the rim of your front tire as you pull the cable. They should be snug enough to provide some resistance as you turn the tire but not too tight that they prevent the tire from turning at all.
You can turn the tire if you cannot do so, but pull down on the brake cable-less.
5. The bolt that holds the brake cable to the caliper must be tightened. Turn the Allen wrench clockwise 2 to 3 times until it stops turning. Once the bolt has been tightened, the cable should remain in its place.
6. The barrel adjusters should be tightened on the handlebars. The barrel adjusters you have loosened previously should be turned clockwise several times until they are fully tightened. The brake pads will be released from the front tire by tightening the barrel adjusters. Your brake cables should now be in good shape after the barrel adjusters have been tightened.
Pull the brake levers to check the brake cables. Now, you should pull the brake levers 1 1/2 inches (3.8 cm) apart from the grip on your handlebars.
Maybe you also need: How To Fix A Bike Chain?
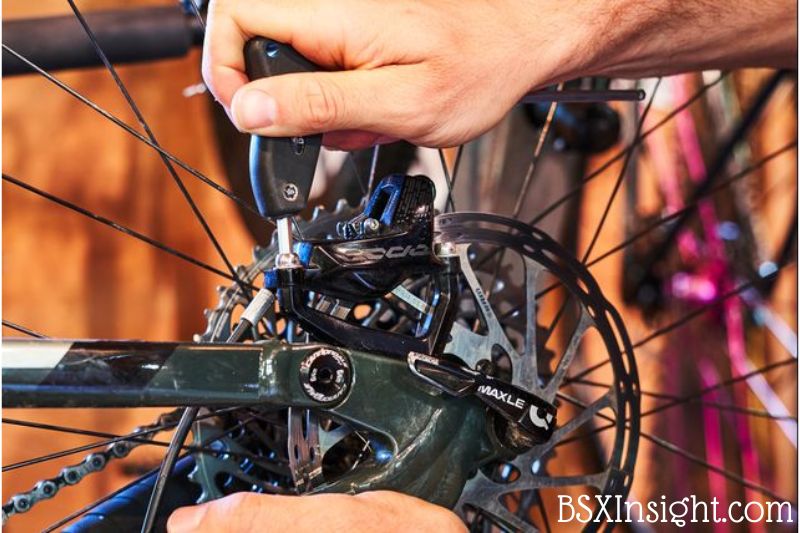
How To Adjust Bike Disc Brakes?

Method 1: Examining Your Brakes
1. Put your bike on a bike stand or flip it over. The wheel of your bicycle should be raised off the ground when you adjust the disc brakes so that it may spin freely. Put your bike in the stand if you have one so it is supported and raised off the ground.
If you don’t have a bike stand, simply turn your bike upside down so that the wheels are sticking up and the seat and handlebars are on the ground.
Most sporting goods stores sell foldable bike stands. They usually cost $35 to $50 USD.
2. Determine what kind of disc brakes you have. Examine the caliper in the middle of each wheel on your bicycle carefully. The calipers on the bike are mechanical if a short cable runs to them. If there are no cables linked to the calipers, they are hydraulic. If you’re still unsure of the type of brakes on your bike, take a picture of them and bring it to your neighborhood bike store.

The rotor is sandwiched between the caliper, which resembles a tiny box around 3 inches (7.6 cm) long. The mechanical mechanism that applies pressure to the rotor and slows down your bicycle is called a caliper.
3. Before adjusting the brakes, tighten your wheel in the drop house. The y-shaped frame that the wheel rests between is known as a bike’s drop house. The drop house is secured to the bike by mounting on both sides of the wheel.
By rotating the lever on the side of the wheel in a clockwise direction, make sure the wheel is securely fastened. Fold the lever in until it is flush with the wheel after you have tightened the wheel.
You might need to manually tighten the wheel in the drop house with an Allen wrench on some older bike models.
4. To avoid getting cut, stay away from the rotor’s edge. The rotor, a metal disc that is circular and to which disc brakes exert pressure, can be quite sharp. Avoid touching the disc’s edge while adjusting your disc brakes. Thumb and fingers should be placed on the disc’s two flat sides to hold it.
Stop immediately and cleanse it with soap if you do get cut. Before you finish adjusting the brakes, treat the tiny wound.
Method 2: Hydraulic Brake Adjustment
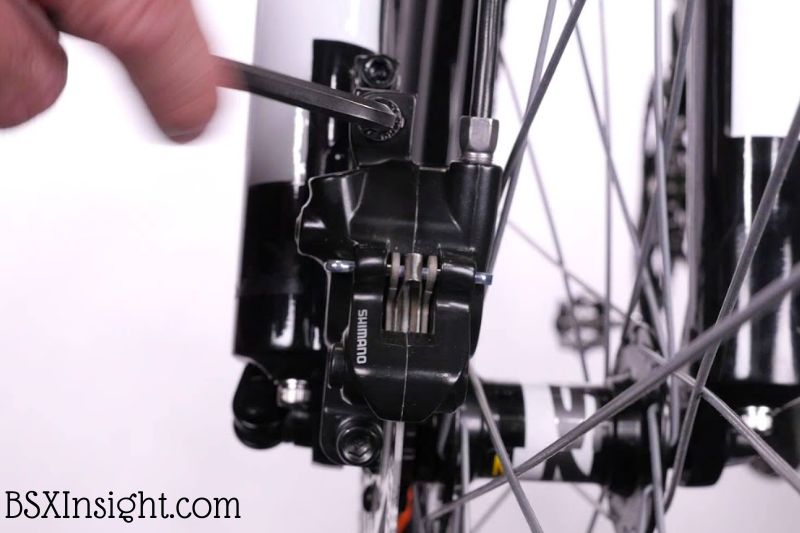
1. If your brakes rub, loosen the two bolts on the side of your caliper. It’s a clue that the brakes are too tight if you can hear your disc brakes rubbing while you ride your bike around. Find the two 1/8 inch (0.32 cm) hex bolts holding the caliper to the frame by looking at the caliper. Insert a corresponding-sized Allen wrench, then counterclockwise twist it halfway.
The brakes should stop rubbing as a result of this loosening.
It’s possible that only one wheel has disc brakes that are overly tight. You won’t need to tighten the brake on your other wheel in this situation.
2. To center the caliper on the rotor, squeeze the brake lever two or three times. Squeeze the brake lever corresponding to the wheel you’re modifying after loosening the two hex bolts. This will re-center the caliper on the rotor disc if it was off-center when you were loosening it.
Maintain pressure on the brake lever during the final squeeze.
The front brake is controlled by the left-hand brake lever, while the rear brake is controlled by the right-hand brake lever.
3. Before releasing the lever, tighten the bolts a half turn tighter. Put the Allen wrench into one of the two hex bolts while maintaining pressure on the associated brake lever. To tighten the caliper around the rotor this time, turn the wrench a half turn in the clockwise direction.
Also, tighten the second set of hex bolts.
Have a friend hold the brake levers while you work on the calipers if you need to service the front and rear brakes at the same time.
4. Check to see if the rubbing has ceased by spinning the wheel. Ensure that the wheel can turn freely and is not obstructed. Spin the wheel firmly (in either direction). Keep an ear out for rubbing noises.
You know the disc brakes have been adjusted effectively when they no longer rub.
5. If the brakes are still rubbing, position the caliper over the rotor visually. If the brakes still rub, turn the bolts loose by one-quarter turn. Visually align the caliper so that it is directly above the rotor by looking down from the top of the caliper.
Adjust the brake caliper’s position until it is perfectly centered while maintaining pressure on the brake pedal. Next, turn the hex bolts a quarter turn tighter.
Spin the wheel once more to check the brakes, and listen for the sound of rubbing brakes.
Method 3: Modifying Mechanical Brakes
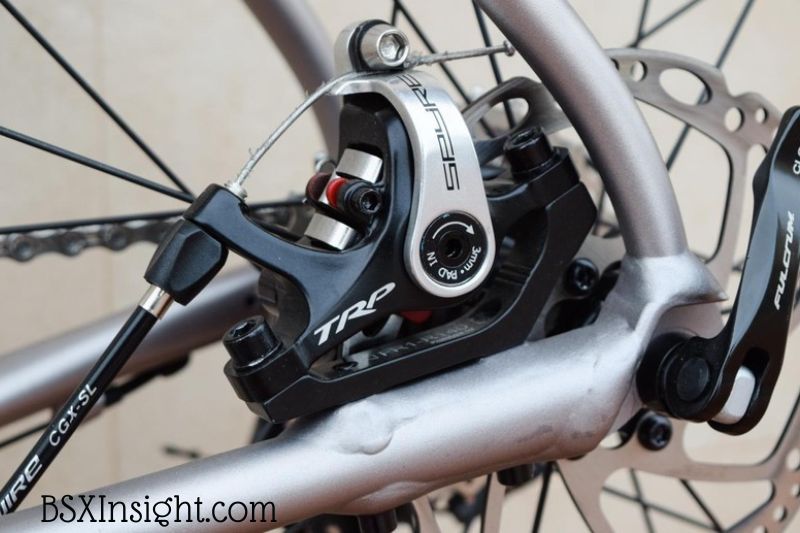
1. Remove the little set screw from the caliper’s side. Some mechanical disc brake types include a tiny “set” screw that tightly grips the caliper’s adjustment dial to keep it from slipping while the bike is being ridden. The set screw should be rotated 1-2 full rotations counterclockwise using a tiny Philips head screwdriver.
A set screw on the caliper is not always present on bicycles with mechanical disc brakes. You can move on to the next stage if yours doesn’t.
2. To adjust the brakes, turn the adjustment dial on the side of the caliper. A 1 inch (2.5 cm) broad plastic dial is typically found on the side of the caliper (near the spokes of the wheel) of bicycles with mechanical disc brakes. The brake pad can be adjusted by turning the wheel in either a clockwise or counterclockwise direction.
The adjustment dial on the side of the caliper may not always be present on bicycles with mechanical disc brakes. In this instance, the caliper will have a hex bolt that serves the same purpose.
3. Adjust the dial until the metal rotor is directly over the center of the caliper. To align the caliper so that it is centered above the rotor, some adjustment is usually necessary. You can detect if the brake pad is rubbing on the disc brake by giving the bike’s wheel a periodic spin and visually inspecting the brake pad.
You shouldn’t be concerned if you notice a slight wobble while the rotor spins because most rotors aren’t exactly flat.
4. To ensure that the brakes tighten, squeeze the brake lever. Squeeze firmly the lever that corresponds to the brake you are adjusting. On either side of the rotor, the two pads ought should tighten. If one pad makes contact with the rotor disc prior to the other, the rotor is not properly aligned beneath the caliper.
The front brake is operated by the left-hand brake lever, while the rear brake is operated by the right-hand brake lever.
5. Before riding your bike, tighten the set screw and the hex nuts. The two hex nuts on the side of the caliper should be turned clockwise using your Allen wrench. Check to see if the hex bolts are tight, even if you didn’t loosen them when you were adjusting your mechanical disc brakes.
Additionally, tighten the little set screw that was previously loosened with your screwdriver.
The bike ought to be rideable once the bolts have been tightened.
FAQs
Why are my brakes constantly rubbing?
Answer: The most common reason is the alignment of the calipers. To avoid premature wear of the pads, the user must act and adjust the caliper alignment.
Which tools are required to adjust the rubbing of bike brakes?
Answer: The Allen wrench is the only tool required to adjust.
What are the signs of a wrong brake lever?
Answer: The most common sign is the squeaking or squealing sound.
Can you ride with a stuck brake caliper?
Answer: The ride will be stressful and tiring as the brakes are constantly engaged.
How tight should bicycle brakes be?
The bicycle brake should be tight before it becomes tough, the brake lever should squeeze 3-4cm.
Why do you need to change brake pads in pairs?
Answer: Maintaining the wheel’s braking power in balance is crucial.
Video
Conclusion
Bike brakes require regular adjusting to provide you with the best possible performance. To ensure that your bike brakes are in peak condition, it’s essential to change them periodically.
Whether you’re in the mood for a rundown on the way to adjust bike brakes or want to know more about this topic, look at some of our other articles on BSXInsight for helpful information.