If you’re looking to get around town on two wheels, you’ll need to know how to assemble a bike. This process is relatively simple and only requires a few tools. With a little bit of know-how, you’ll be riding your new bike in no time!
Can You Assemble Your Own Bike?
If you’re handy with tools and enjoy working with your hands, you can absolutely assemble your own bicycle. It can be a fun and satisfying experience, especially if you choose all of the parts yourself. Of course, it’s important to do your research ahead of time and make sure you have all the necessary tools and know-how. But if you’re up for the challenge, building your own bike can be a great way to get exactly the ride you want.
How To Assemble A Bike?
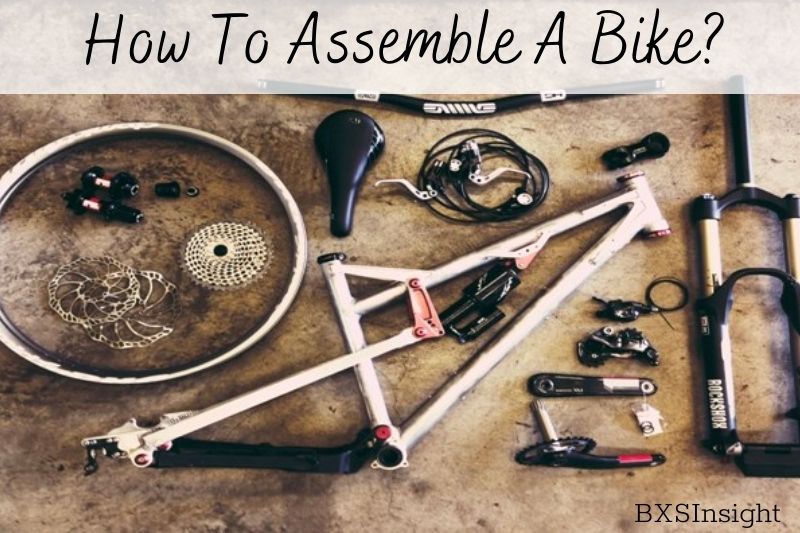
1. Unboxing
To open the box, hold the box upright and move your hand down the underside of its top flap.
To prevent any injury to your bike or yourself, you will need a large flat-head screwdriver.
For shipping, the handlebars and front wheel will need to be removed. Take them out of the box and take away any protective packaging.

It would help if you kept the packaging in your possession. It will be helpful if you have to return the bike or need it to travel.
Make sure you check the box for any manuals or paperwork. Also, make sure to inspect any parts in a separate container. They will be needed later, so keep them safe.
2. Tools To Help You Do Your Job
Depending on how your new bike needs to be assembled, you will need the following tools.
- Allen (hex) keys
- Optional: A small torque wrench (or torque key)
- Bike grease
- Carbon assembly paste (if you have carbon parts on your bike)
- Pump

When tightening bolts, be sure to use a torque wrench, or key, if any of the new bike’s components are made of carbon.
Carbon assembly paste is a paste that has a gritty texture to increase grip. It’s used wherever there is a carbon component. This is most commonly the seatpost.
You may be able to purchase the necessary tools from some retailers or bike manufacturers. We have included an essential torque wrench and a variety of bits to use it.
3. Place The Seatpost
Before inserting the Seatpost, remove the saddle from the package. Later, we’ll adjust the saddle height.
Use a clean cloth to remove any excess paste.
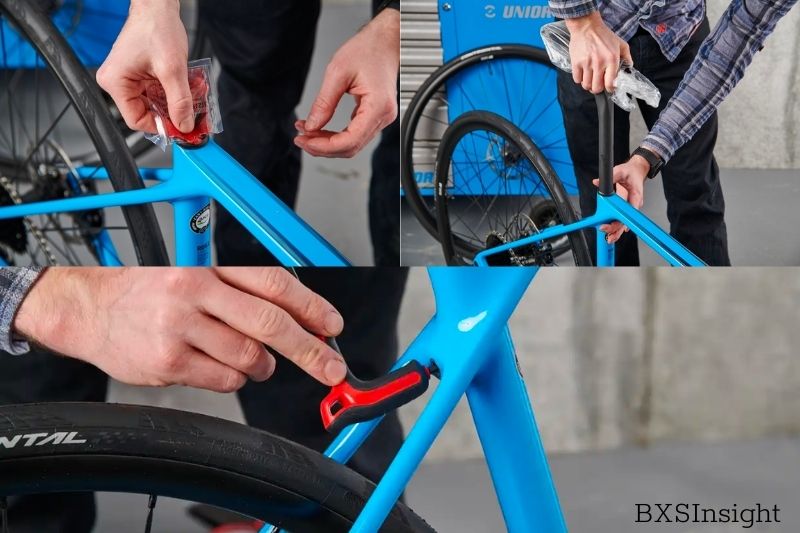
Note: The seatpost bolt for this bike is located at the rear end of the seat tube, in between the seat stays. Check the manual, clamp, or frame for the correct torque setting before tightening your seatpost clamp.
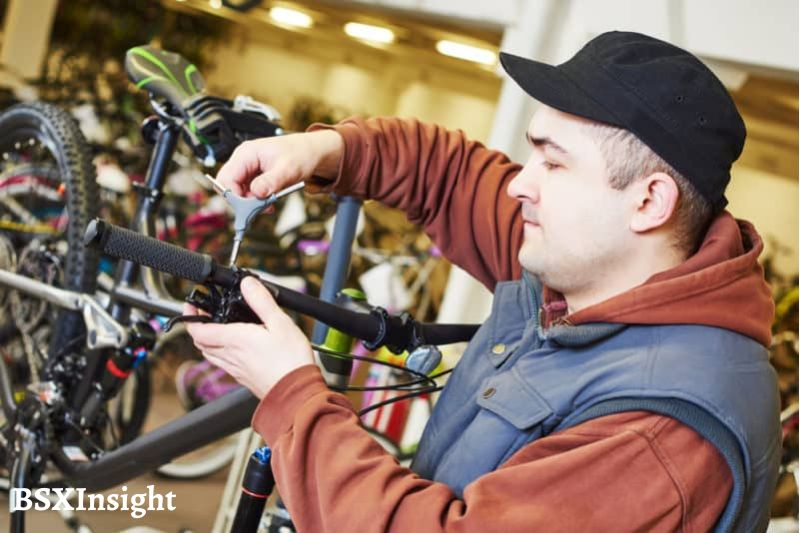
4. Attach The Handlebar
Now attach the handlebar.
Many newer bikes, especially mid-to-high-end road bikes, have integrated cockpits that combine the stem and handlebar. To ensure that the handlebar fits correctly, consult your manufacturer’s manual.
This new bike has an integrated Canyon Aerocockpit. Slide the stem base onto the steerer tube and tighten the two stem bolts until they reach the required torque setting.

Before nipping at the bolts, make sure the bars are straight.
If you don’t have one, you will need to replace your traditional two-piece stem/handlebar set.
- The plate that holds the stem’s handlebar to its branch is located at the front.
- Place the handlebar on the bolts and tighten them to the correct torque setting. Note: Make sure the bolts are tightened evenly. There should be an even distance between each bolt and faceplate. Some stems may differ. Double-check.
- Next, loosen the bolt at the top of the stem by tightening the bolts at its base. Once you feel some resistance, The bolt at the top of a traditional stem fits directly into the star nut or bung in your fork’s steerer. This preloads your headset. This bolt has an Nm setting because each bike is different. Too loose, and the headset will move fore and aft; too tight, the headset bearings within the frame will be crushed. You should check for movement at the stem spacers and frame intersection.
- Straighten the stem until it aligns with the front tire
- Secure the stem bolts at the manufacturer’s torque setting by locking them together.
This assumes that the handlebar height does not need to be adjusted. We have a separate guide that explains how to change the height of the handlebars.
5. Place The Front Wheel
Place the wheel in the fork.
There are generally two types of axles on a bike.
Thru-axle: The diameter and length of a thru-axle will vary depending on the bike. It bolts the wheel directly into the threads of the frame or fork.

Quick-release Skewer: A thin skewer that passes through the wheel. The bottom of the fork and rear frames have dropouts (open slots) to pass over the hub’s axle. The threaded end of the skewer holds it in place with a nut.
After the skewer has been threaded into a nut, the lever will be used to adjust the tension and clamp the frame onto the hub’s axle. The lever should be closed with enough force to make a mark in your palm. Because brakes can rub if the dropouts are misaligned, make sure you have the wheel straight.
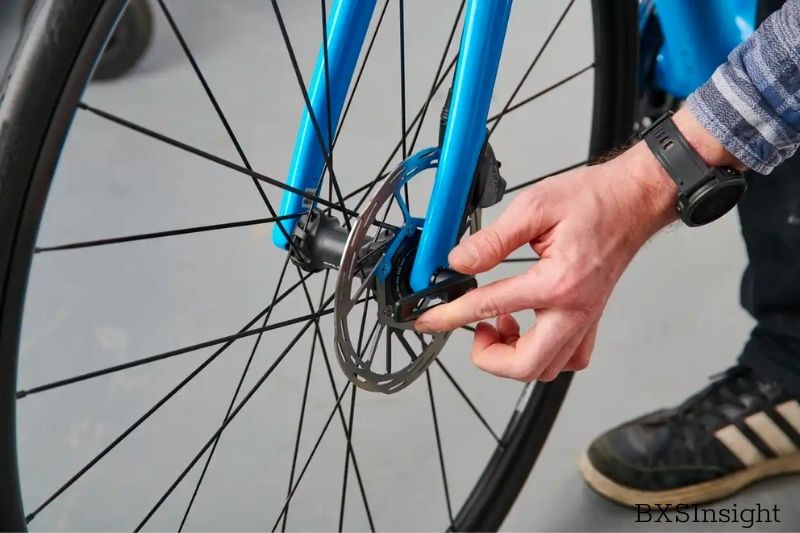
Notice: Rim brakes are required to ensure that the wheel is in the correct orientation. Locate the direction arrow/rotation arrow on the sidewall. Lightly grease the thread of the thru-axle if the bike has disc brakes before inserting it through your fork and wheel.
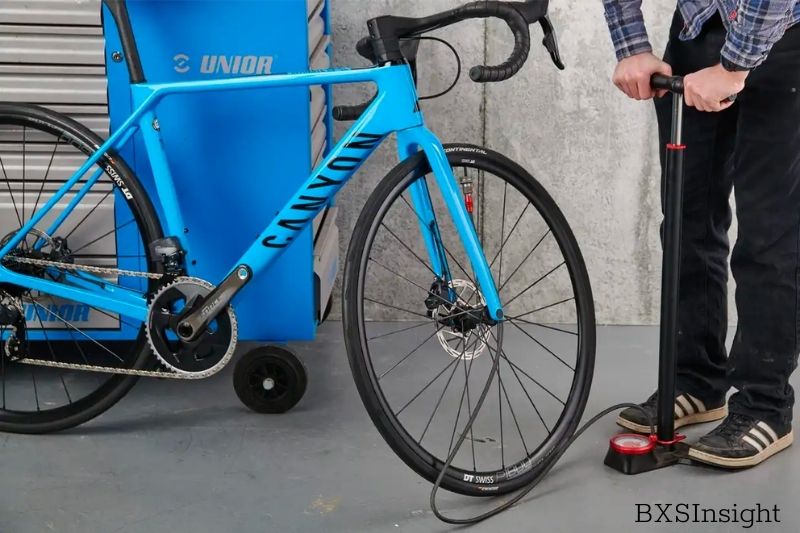
6. Inflate The Tires
Check the pressure on your tires by inflating them.
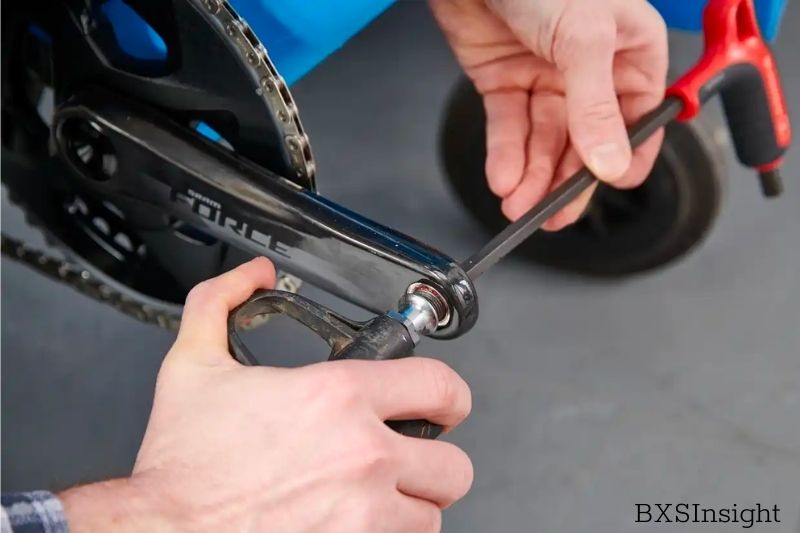
7. Install Pedals
Although your bike may come with inexpensive pedals, most riders will opt to own it.
Grease the threads of your pedals, and then install them with a pedal spanner (or Allen key, depending on the pedal).
Notice: The pedal threads are side-specific. Both pedals go in the forward direction. You should mark the pedals with L and R if you are unsure which side they go.
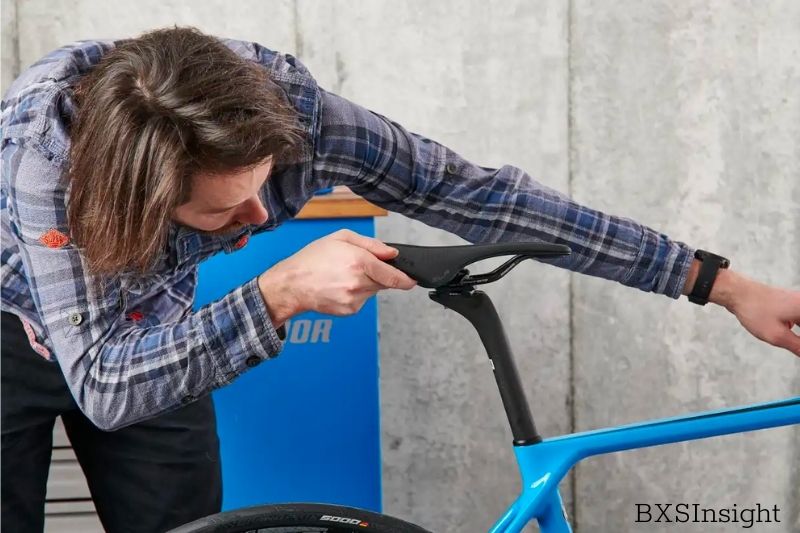
8. Adjust The Saddle Height
Make sure the bolts on the saddle rail are tight. Also, make sure the saddle is straight and level.
Next, tighten the seatpost clamp to the recommended value.
9. Final Checks
Manufacturers and retailers should have installed the brakes, gears, and cables before despatch. However, the bike should be inspected for safety and the gears indexed correctly.
It is an excellent opportunity to take a picture or note of your bike’s serial number in case you need it.
10. Go ride!
Take a spin, feel the brakes, and check for any niggles.
Video
How Long Does It Take to Assemble a Bicycle?
Assuming you have all the necessary parts and tools, building a bike should only take about an hour or two. If you’ve never done it before, it might take a bit longer, but it’s not terribly difficult. Just be sure to follow the instructions carefully and double-check everything as you go.
What Are The Biggest Dangers of Assembling Your Own Road Bike?
Backward Forks
You’re probably going to witness a lot of rides with reversed-fork syndrome if you browse through the general bike tags on Instagram or, better yet, go to your neighborhood large box/toy store. Reversed forks are a fairly simple error if you aren’t used to looking at motorcycles, but once you do, they stand out like a sore thumb. A flipped fork affects your handling and stability and puts unforeseen strain on your bike’s longevity every time you hit a pothole or ride down a curb.
Forks will typically move the front wheel farther forward, expanding your wheelbase and enhancing stability. Or quick alternative, your fork is probably backward if your front brake is positioned in front of the fork.
Many bikes have their forks shipped backward to conserve space in the package, but if you don’t flip it when you assemble, the result will be an amusing-looking vehicle (and probably earn yourself some funny looks too).
Tilted Saddles
This is a topic we’ve already addressed. Still, you’ll typically notice it whenever a sizable group ride is taking place, or you’re with people who are simply “taking that old bike out of the garage for the first time in forever.”
The majority of the time, a slanted saddle indicates poor bike fit (or just a lack of flexibility from taking a while between rides). Do your best to flatten out those seats right out of the box because, for the most part, a level saddle will give you the most support, ease pressure areas, and help you maximize your performance.
After a few rides, you can make tiny modifications as necessary, but the solution is virtually never “tilt the saddle further”. Your best chance for fit is typically to adjust your bars (higher or lower), stem (shorter or longer), or saddle (forward or back).
A Wonky Bar
People “get creative” with their bars to improve their fit, but that’s rarely the best option. Flipped-up drops, upside-down risers, and sharply inclined bullhorns are just a few examples. The fact is, it only requires a few screws, some tilt, and some time. However, the majority of cyclists who have crooked handlebars are actually in need of stem adjustments.
Sometimes all it takes is a simple flip of the stem or a spacer on the steerer tube to move it up or down. Perfecting your fit will save you money (and comfort) in the long term, help prevent injury, and keep you riding longer. Sometimes you may need to spend the money for a new stem (or an adjustable one) or bars with a shorter reach.
FAQs
Can I assemble a bike myself?
Over the last few years, the number of bikes sold online has rocketed. Buying online means you have far greater choice than what your local bike shop may offer, but it means you have to do the final bike assembly yourself when your new ride arrives in a box.
How long does it take to assemble a bike?
It takes about 45 minutes to assemble it. It helps to have a bike with quick-release wheels and cable quick disconnects (not required for regular bikes).
In what order do I put my bike together?
To assemble a bicycle, you’ll need Allen keys, a wrench, and a Phillips head screwdriver.
What tools do I need to assemble a bike?
You will need the following to build your bike:
- Knife or Sharp Edge.
- Allen Wrenches.
- Torx Wrenches.
- Scissors or Clippers.
- Center Lock Tool.
Is 10kg heavy for a kids bike?
Remember, weight is also relative: while 10kg is only an eighth of an 80kg adult rider’s weight, 10kg is half of a 20kg child’s weight. A high-quality children’s bike will now be made from aluminum and also feature very good parts to keep the weight down.
What size bike is best for an 8-year-old?
Most 8 and 9-year-olds will fit on a 20-inch wheel bike. Meanwhile, a 10-year-old (or older) will likely use the 24-inch size. Keep in mind that if your 10-year-old is smaller, they may still be more comfortable with a 20-inch bike wheel.
Conclusion
So there you have it, the basic steps to assembling a bike. If you follow the instructions and check for errors along the way, the assembly shouldn’t be too complex.
Even if you’re a little nervous, putting together a bike is a great way to get familiar with bike assembly and maintenance. You can’t go wrong with building a bike in your garage or taking on a challenge from your local bike shop crowd. BSXInsight hopes this tutorial is helpful!