If you’re an avid BMXer or mountain biker, you know that a suitable bike ramp is sometimes the only thing standing between you and a sick jump or trail. Bike ramps can be expensive, but fortunately, they’re not too difficult to build yourself.
With a little bit of planning and suitable materials, you can have your bike ramp up and ready to shred in no time. Here are some tips on how to build a bike ramp.
What Are Things You Need To Know?
The space available at your home or bike park is crucial for building a DIY bike ramp. A small-sized bike ramp will fit in a garage or backyard and still allow for enough movement.
Here are the materials needed to build a small bike ramp.
- Plywood sheet 3/8″
- 2x4x10 Table Saw or Circular Saw
- Jigsaw
- Drill bits and drill bits for pilot holes
- Driving screws
Once you have all the necessary materials, you can begin to build a ramp that will allow you to ride your bike.
- Three cross beam supports
- Reduce the vertical supports
- Get the bike ramp deck
- Make a base plate
- All the pieces should be assembled
- Install the ramp deck
- Install the base plate
How To Build A Bike Ramp? Step By Step
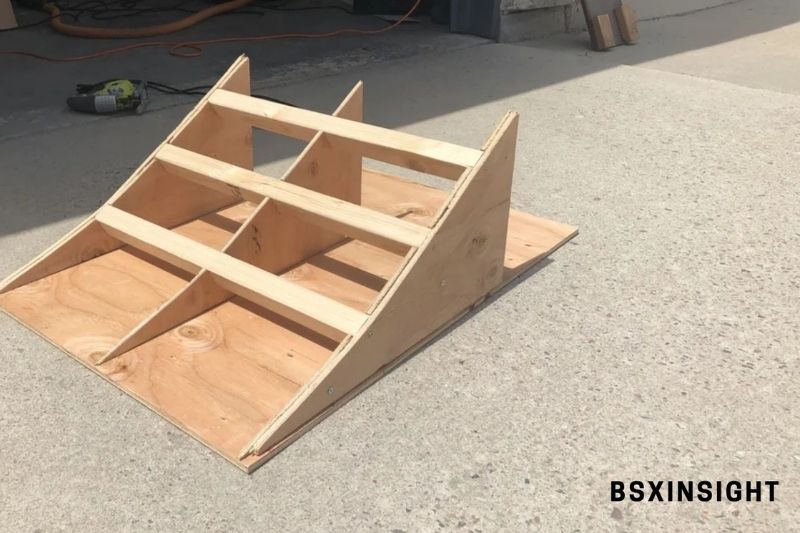
Step 1. Make Three Cross Beam Supports
It is essential to have three cross-beam supports to build a bike ramp. They should all be the same. The wood pieces support the ramp deck by locking the vertical supports together.
This step requires you to cut the 2x4x10 in half. You will need to cut them into the desired length of 24 inches. Cut an additional support beam about 23 inches long to cover the bottom edge at the back.
Step 2. Cut The Vertical Supports
Next, cut the vertical supports. To make a high-quality bike ramp, you will need three vertical supports. Make sure that all vertical supports are equal in size.
Start by cutting plywood into rectangles measuring 24 “x12”. You should cut three rectangles of the same plywood. Next, draw a curve on one end to make the foundation for the bike ramp.
Using a jigsaw, you can trace the outline you have drawn to create a curve. This process can be repeated for all rectangles made from plywood. After creating identical vertical supports, make slots for cross-beam support.
You should locate three points on your curve to determine the slots:
- Top, middle, or bottom.
- Draw the cross beam to ensure that the places accommodate the cross beam.
- Use a jigsaw to cut the slots.
Adjust the cross beams by fitting the slots. Make sure that your vertical supports and beams are appropriately sized to be interlocked. This will ensure that the foundation of your bike ramp is strong and won’t separate during use. Next, place the horizontal 23-inch beam support you cut earlier at the back and enough space for the vertical supports.
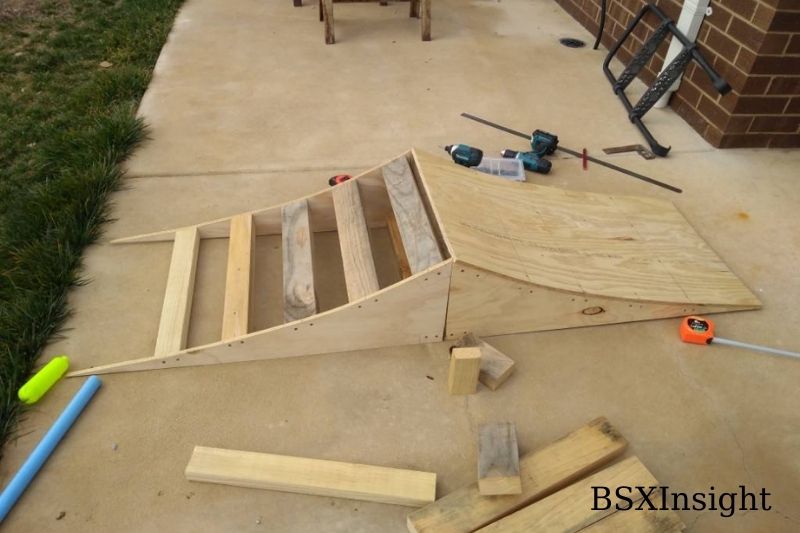
Step 3. Make The Bike Ramp Deck
Once you have constructed the foundation for your bike ramp using cross beams, vertical support and cross beams, it is time to start the deck screws. The plywood should be cut into strips 24″ wide and 26 inches long for the deck. This can be done with a circular or table saw.
Step 4. Build A Base Plate
Because it’s a portable ramp, it must be stable and not move. The beginner ramp can be held in place by a base plate. Cut the plywood to 24″ wide by 34″ long for the base plate. The base plate should extend 10 inches beyond the bike ramp.

Step 5. Assemble All The Pieces Together
You should now have all the components of your bike ramp: cross beams, vertical support, deck and base plate. These parts can now be assembled.
You must ensure that the surface you are building your bike ramp is smooth and even. Next, screw the ends of the vertical supports to the cross beam. Make sure that the supports are evenly spaced and arranged. The vertical supports can be attached to the bottom beam using screws.
Once the vertical supports are installed, place the horizontal cross beams over them. Verify that the cross beams fit in the slots on the vertical supports. To ensure that the beam and supports are correctly attached, you can use screws.
For the remaining cross beams, repeat the process. The assemblage should be solid and stable after it is completed.
Step 6. Install The Ramp Deck
You should attach the deck and base plate last. Install your ramp deck, and align it with the ramp frame. Make sure that the deck’s backside is stable.
Drilling through the deck can be done by passing through one of the cross beams. To hold them together, use a screw. You must ensure that the deck is installed correctly on the frame. To ensure that your ramp deck is installed correctly, you can use multiple screws.
Step 7. Install The Base Plate
Turn the bike ramp upside-down to install the base plate. Drill pilot holes in the base plate to align with the ramp. Next, drive screws into the bottom cross beam and vertical support.

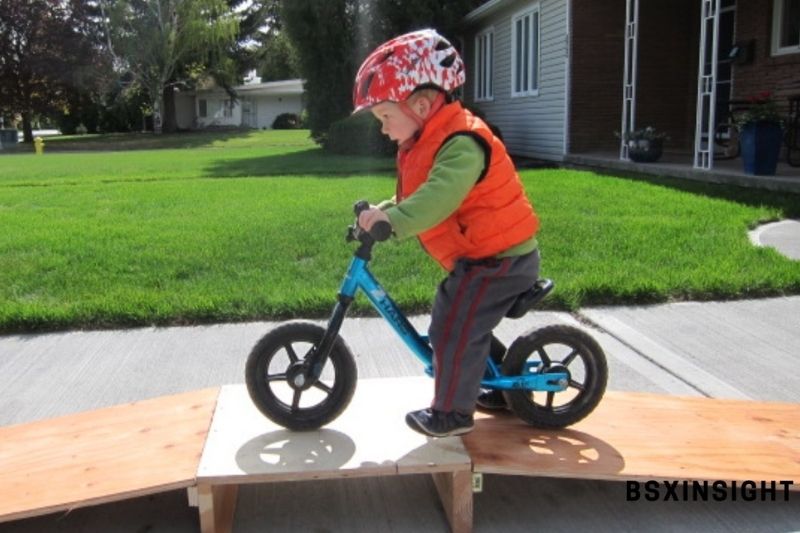
Types of Bike Ramp
Skinny Bike Ramp
Skinny’s are the simplest feature to construct; simply have your child follow a painted/chalk line on the ground. The first step in learning to ride a thin is to learn to stay right on the line for 6/8 feet.
Rock Garden Bike Ramp
If your child needs to learn how to pedal hard through bumps, have him or her ride over thin pieces of wood, 22s, or small rocks hot-glued to a big sheet of plywood.
As a person’s sense of self-worth grows, so should the difficulty of the problems they face. After getting kids to pedal, the next step is to teach them how to steer their front wheel and, later, their back wheel over big obstacles while changing their body position. You can make a more complicated version of this by drilling climbing grips into plywood.
Turning between a row of cones is a great way to teach how to put the wheels in the right place.
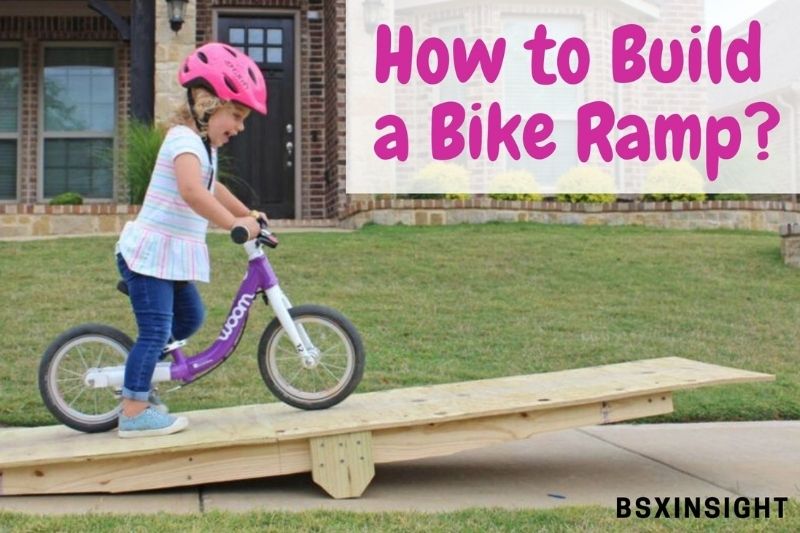
Teeter Totter
Younger riders can enjoy teeter-totters to their fullest potential so long as there is adequate room between them. You can learn timing and equilibrium from them. The greater the rider’s skill, the tighter the ramp.
How Steep Can a Bike Ramp Be?
The steepest slope a ramp should have is 1:20. Depending on the distance to be traveled. There may be times when steeper slopes are okay (fig. 4). Landings on ramps should be available for resting, getting around, and keeping from going too fast.
FAQs
Which angle is best for a bike ramp’s landing?
Keep the height at 10 inches and the angle at 30 degrees for beginners. This will make an excellent starter ramp. Pro tip: A 45-degree angle will give the best height and distance if you are looking for big air mathematically.
What material is best for a ramp?
Materials and Tools Steel, aluminum, and lumber can all be used to build DIY ramps. However, this is not the most cost-effective option. When properly maintained and constructed, kid’s bike ramps made of pressure-treated wood can be as strong and durable as a deck.
How can you make a ramp from a pallet?
Begin by disassembling your pallet. Take measurements of the length and width of your staircase. Your pallet pieces should be cut to the dimensions of your ramp. Attach your support pieces. Attach your artificial turf to the top of the DIY bike ramp. For the low-profile ramp steps, nail in your molding pieces.
How can you create a 45-degree angle without using a protractor?
Explanation: Draw any length line segment BC. If B is the center, draw a semi-circle that bisects BC at P. The arcs will intersect the semi-circle at points x and y.

What is the best way to make a 30-degree angle without a compass or protractor?
Draw a vertical line connecting both the rays and the acute angle. Draw a vertical line connecting the rays of the critical angle. The horizontal line will become the side adjacent to your triangle, and the vertical line will become the side opposite to the acute angle you are trying to measure.
What does a 45-degree angle look like?
What is a 45-Degree Angle? A 45-degree angle is a sign that is greater than (>) or less than ((<).). The 45-degree angles will be formed if we draw an angle bisector from a 90-degree angle. It looks a lot like a pair of scissors.
What width should a kicker ramp be?
Another easy-to-build structure is the skateboard kicker ramp. It doesn’t need much wood. This kicker ramp measures 6′ long, 4 feet wide, and 6 feet tall. To make it more maneuverable, you can attach a set of old trucks with a rear-wheel to its back.
What height should a kicker ramp stand?
For a kicker ramp, the height is between 1 and 1.5 feet.
What are the steps to build a kicker ramp?
Kicker Ramp Materials 12 feet of 2x4s (6 at 23″) Many screws (20 1″ screws, 24 at 1 1/2″ screws and 2 3/4″ screws to attach the metal bottom) One half-inch thick plywood sheet measuring 2 feet by 4 feet. One piece of thin metal (One 3/16 inch thick piece of sheet metal at 10 inches by 4 feet).
What can I do to prevent my feet from sliding down a ramp?
Hard Rubber Matting. The same rubber mat used in playgrounds, backyard pump track, gyms, and daycare centers can be used as an anti-slip surface for a wheelchair ramp. Rubber matting can be purchased in self-adhesive and interlocking tile forms.
Video
Conclusion
The DIY ramp is a great way to have fun and help develop better bike handling skills. If you’re interested in a homemade bike ramp, whether it’s a short one for your bike or a big one that covers your whole backyard, you need to make some plans.
Also, if you have any personalized content ideas or tips for building a bike ramp, be sure to share them in the comments section below. BSXInsight would love to hear what you have to say.