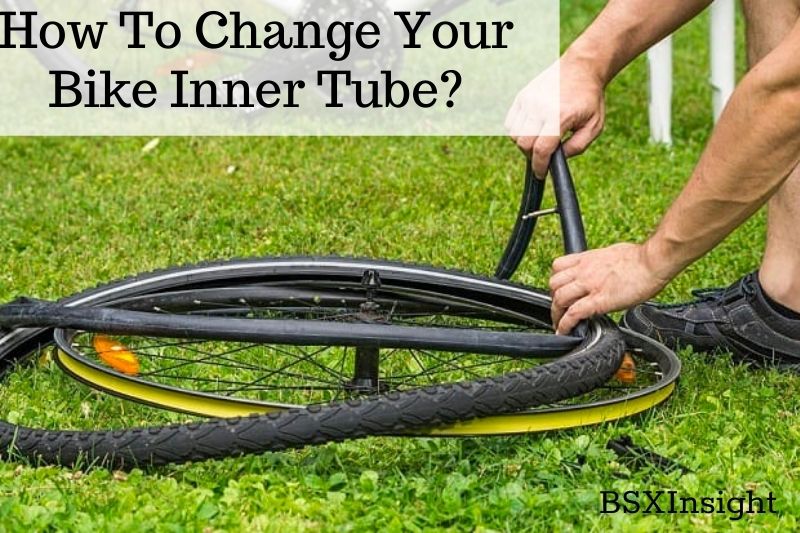
If you’ve ever gotten a flat tire while riding your bike, you know how frustrating it can be. Fortunately, changing a bike inner tube is a relatively straightforward process that anyone can learn with practice.
In this article, we’ll walk you through the steps necessary how to change bike inner tube so that you can get back on the road as quickly as possible.
Tools Needed to Change Bike Inner Tube
There is less risk of pinch injury when the bike tire and bike rim can be mounted and removed without tyre levers. If you’re using carbon rims, you’ll want to use high-quality tyre levers rather than cheap ones, which can bend or snap.
A good pump is a must-have as well. Lower pressures on a gravel bike can be handled with a hand pump, but for pressures over 60 psi, you’ll want to use a workshop track pump. This means you’ll need a new inner tube that fits your bike tire perfectly and has the correct valve type and length. This is necessary.
Disposal Of The Inside Tube
1. Inflate The Tire
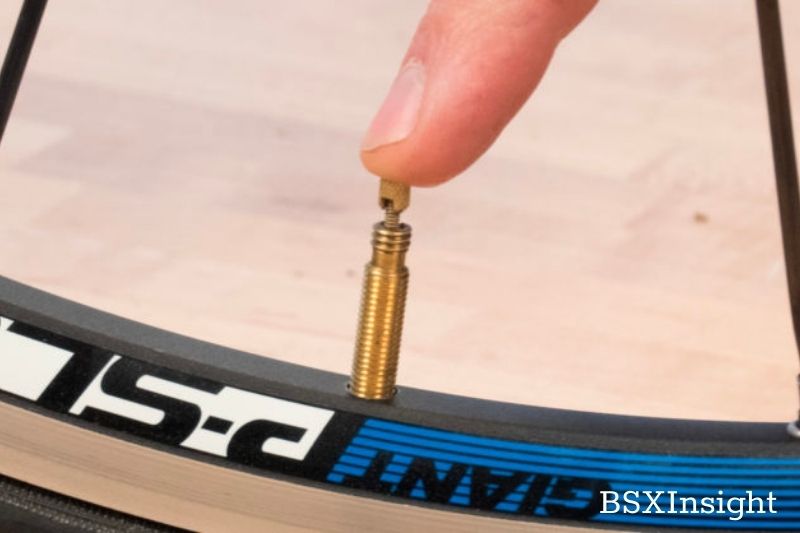
The first step is to remove the bike’s wheel. Flip your bike upside down to make the process easier if you’re out and about. You can do this by loosening the small barrel at the top of the Presta valve slightly and then pressing it down if your tire isn’t already completely deflated. Remove the knurled collar at the valve’s base by unscrewing and removing the screw.
To release the little air from a Schrader valve on a kid’s or mountain bike, press the pin in the center of the valve stem.
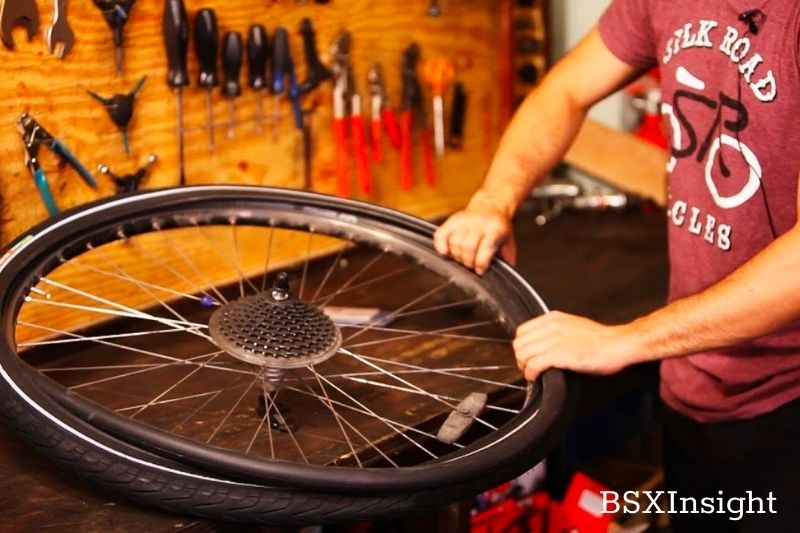
2. You Can Remove The Tire
A deflated inner tube means the tire’s bead can be pushed closer to the rim’s center. Do this on both sides of the tire to make it feel squishy.

3. Handly Remove The Tire
Lift the entire wheel by the tire and shake it to get all the slack in one spot if the tire is too loose. This will necessitate the manual effort of pushing the tire around in both directions simultaneously, with your hands meeting at the bottom of the bike wheel to collect the slack.
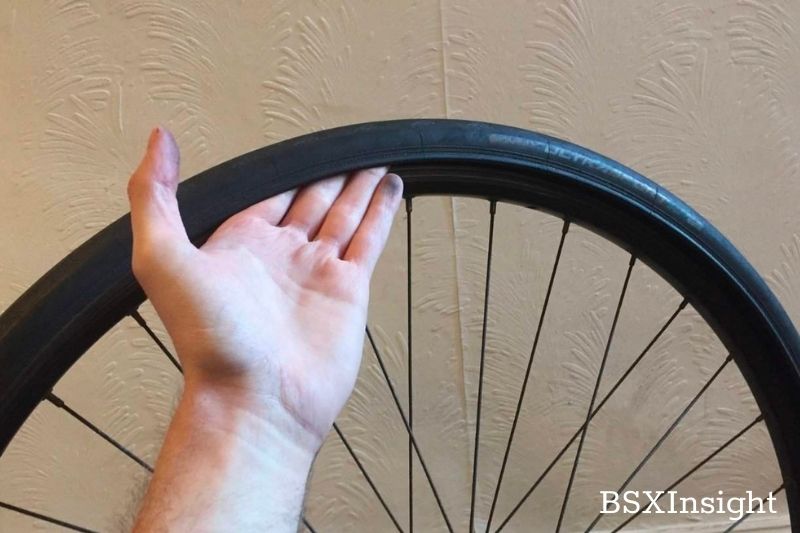
Push the tire edge off the wheel rim with your thumbs if there’s as much slack or you’re feeling powerful. In addition to flexing your skills and tendon toughness prevents the bicycle inner tube from being trapped between the rim and tire lever and puncturing it. If you can, it’s worth it to stick with it.
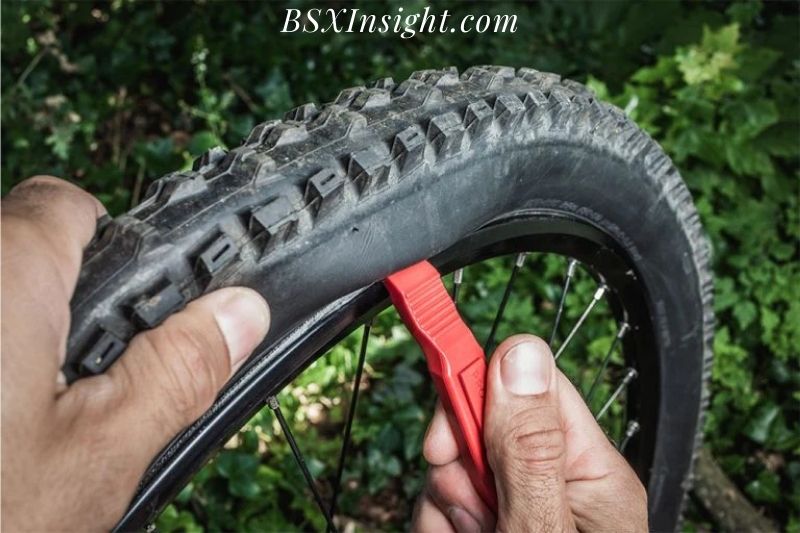
4. To Remove The Tire, Use Tire Levers
However, don’t feel bad if you have to use tire levers; be cautious. The spoon side of the levers should hook under the tire’s bead, so place them 2 cm/1 inches apart under the drip. If the bicycle inner tube is trapped against the rim on the other side, you’ll need to fix another puncture.
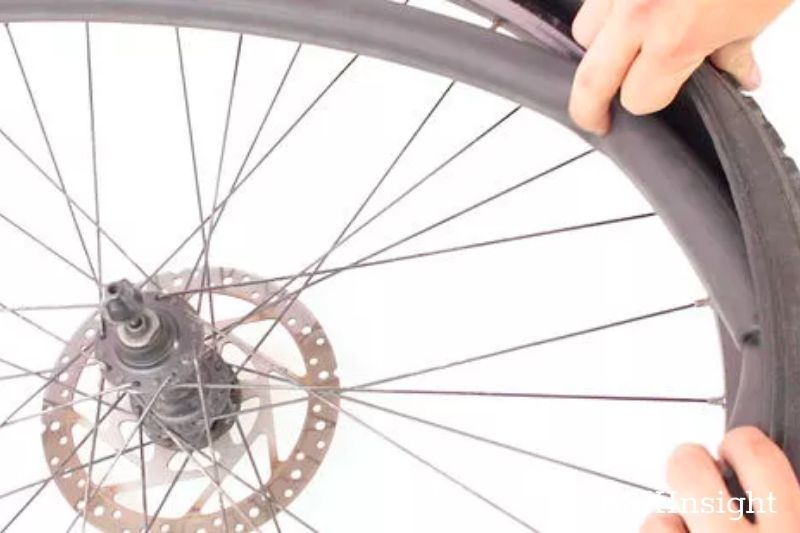
First, lift the tire edge over the rim with one tyre lever, and then use the second lever to remove the remainder of the tire. Using one tire lever, secure the tire to the edge by hooking it around the spokes closest to you.
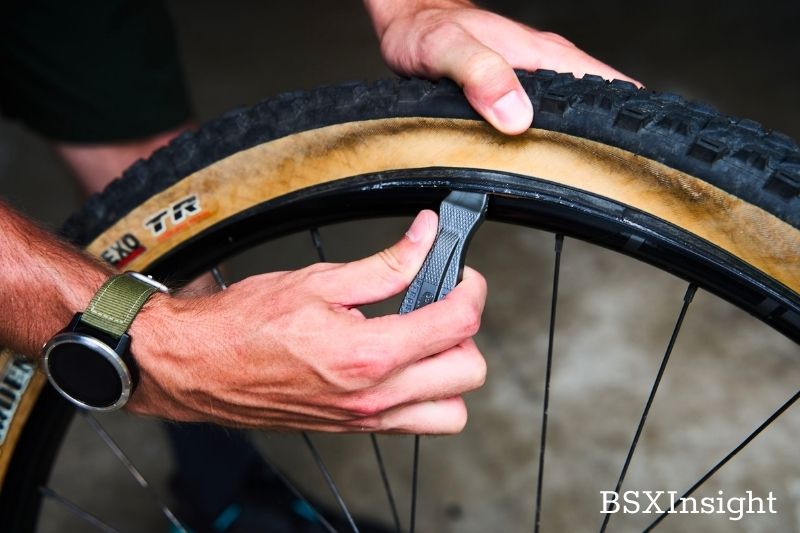
Depending on how tight the tire is to the rim, you may need to use both levers simultaneously to pry it off. If you’re using two levers to work on a particularly tight tire, things can go flying. Keep an eye on yourself and keep your valuables out of harm’s way.
5. Remove The Inner Tube
Then use the levers to remove the tire from the rear wheel in a circular motion around the entire rim. The tire should be left in place, but the presta valve should be pushed back through its hole before the bike tube is gently pulled rear derailleur out.
6. Examine The Tire
It’s an excellent time to inspect the tire for any damage or splits in the tread when the inner tube is removed. Remove any thorns, nails, or other foreign objects from the inside of the tube before inserting the new one to prevent punctures.
You don’t want to puncture yourself if you’re running your finger around inside the tire without looking first! Look for cracks, dents, or sharp edges on the wheel’s rim.
Installing A Neutral Tube
1. Set Up The Tire
Pull the tire around to align the name or logo with the valve hole if it hasn’t already been done. You can find the valve in a hurry, and it serves as an excellent reference point for finding punctures.
2. Insert The Tube Into The Nozzle
Inflate the inner tube to the point where it takes on some shape, decreasing the likelihood of pinching. Once you’ve removed the threaded collar, you’ll want to keep it handy when you insert the inner tube valve.
So that it doesn’t protrude over the rim edge, massage the inner tube into the tire’s belly with your fingers carefully. Keep an eye on the inner tube and avoid twisting or pinching it.
3. Install The Tire’s Second Side
Start with your thumbs on the side opposite the valve to get the tire back onto the rim. Remember how you moved the slack of the tire into one place before you removed it, and try to replicate that movement as you push the tire back onto the rim. You want to have as much wiggle room as possible in the final stages of the project. To avoid puncturing the inner tube, you must exercise extreme caution.
4. Using Tire Levers To Install A Tire
Put as much white-knuckle, tendon-straining determination into getting the tire on as you can muster. Insert the levers carefully under the tire edge when you can’t get it on any further by hand.
They should be spaced about an inch and a half (2.5cm) apart from the raw ends. Lift the tire onto the rim by securing one lever and the other to the rim. Alternate this motion as you move closer to the valve, working inwards.
5. Inflate The Tire With Care
After the tire is installed, double-check that the inner tube isn’t protruding from the tire. It’s essential to check that the tire valve is not trapped before reinserting it into its rim with the lock ring.
As you slowly inflate the inner tube, look for any hernias or unusual tire bulges and bumps. Use the bottom edge line as a guide to make sure the tire is correctly positioned around the wheel before applying more pressure.

6. Final Inspections
Remove the pump from the tire and spin the wheel to make sure the tire is inflated correctly, both horizontally and vertically. You can re-inflate your bike tire after deflating and massaging any strange sensations you experience.
How To Change A Bike Tire

Why Change Your Road Bike Tires?
As was already said, the efficiency of your bicycling is directly influenced by the tires on your road bike. It makes driving more comfortable and guarantees your safety. You can also have complete control while riding with road bike tires.
Here is how to determine whether a tire needs to be replaced or changed:
Worn Out Tread
A bike tire has a distinct pattern of groove cutouts that may be seen if you look at it attentively. These are the bike tread cutouts. When navigating on any kind of road, it is helpful.
Your bike tires would begin to wear out until they were smooth or bald if the tread grew shallow. This will cause traction to be lost and almost certainly lower the quality of your ride. It also suggests that you require new road bike tires.
Punctures When Cycling
Your tires will begin to puncture more frequently as they age. It won’t just endanger you while you’re riding; it will also cause you a lot of trouble. Regular punctures will make you less likely to ride on the road or join a group because of the disruption they cause.
If this occurs, examine your tires to see if they require replacement.
Dry-rot
Your tires will develop dry rot if they are constantly exposed to corrosive substances like gasoline or cleaner. Dry decay invites a potentially dangerous circumstance. A tire failure could happen, especially if you’re biking downhill at a higher pace. To quickly change a road bike tube and tire, it is essential to examine your tires for dry rot.
Step On How To Change The Tire On A Bike
STEP 1: Remove The Wheel Nut or Quick-release Lever.
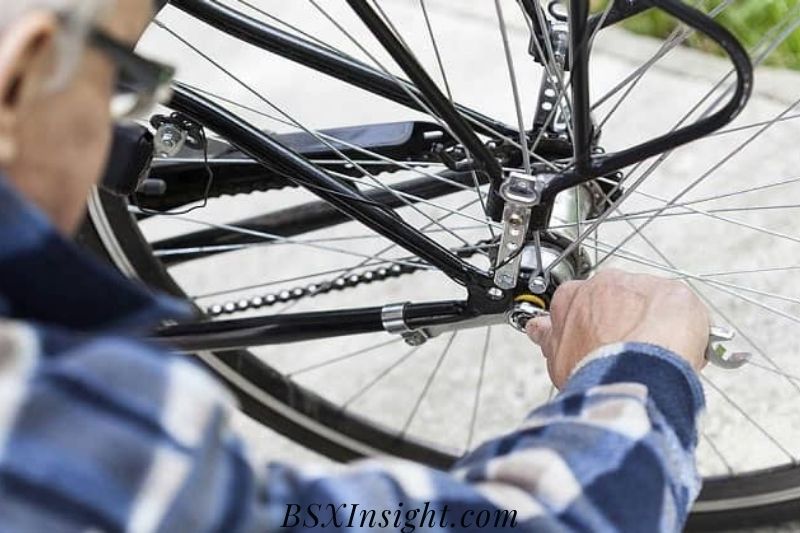
The quick-release lever will be in the middle of the wheel if the bicycle has one. Pull up and spin the lever 180 degrees to release and remove it. After that, put it away until reinstallation. This ought to release the wheel so that the damaged tire may be changed. However, a quick-release lever is not standard equipment on many bikes. If this is the case, a wrench is required to remove the wheel’s center nut.
The right size tool to remove the wheel nut is often a 15-millimeter wrench. Remember that you can also look for information on how to remove your particular bicycle tire on the manufacturer’s website or in the bicycle manual. Additionally, WD-40 or any comparable lubricant can be used to aid loosen the threads and removing the nut if it is seized.
STEP 2: Remove The Tire and Unplug The Brake Lines.
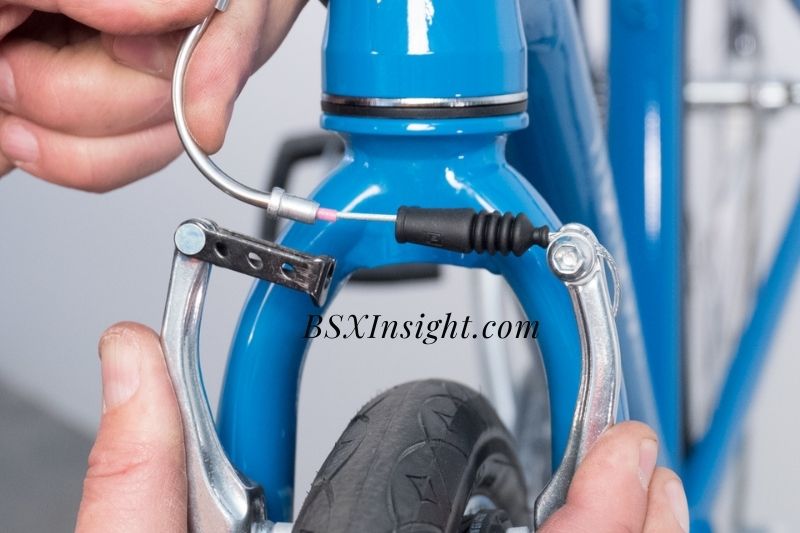
Brake cables may be harmed if you attempt to remove the wheel without first disconnecting them. On some bikes, the brake cables will automatically release when the quick-release lever is pulled, but in the majority of situations, the brake calipers must be pressed.
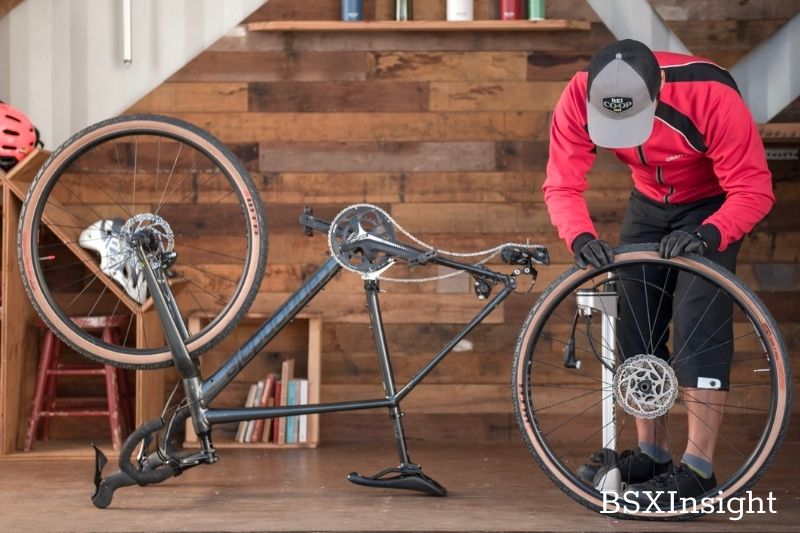
When swapping out the back wheel on a bicycle, don’t forget to remove the chain off of the gears. The tire can be lifted or pulled out of the forked slot where it typically rests on a bicycle once the chain and brake cables have been detached and the wheel nut or quick-release lever has been taken off.
STEP 3: Deflate The Tire and Remove the Retaining Nut For The Valve.

The rubber tire must be totally deflated in order to be removed from the metal wheel. The air valve cap should be removed and stored for reinstallation. With a wrench, deflate the tire by depressing the plunger within the air valve. The air must be released by pulling up the Presta or Dunlop valves, which your bike may also have.
If the air valve is attached to the wheel rim by a retaining nut or lock ring, remove it by loosening it and storing it with the air valve cover for reinstallation later on in the procedure.
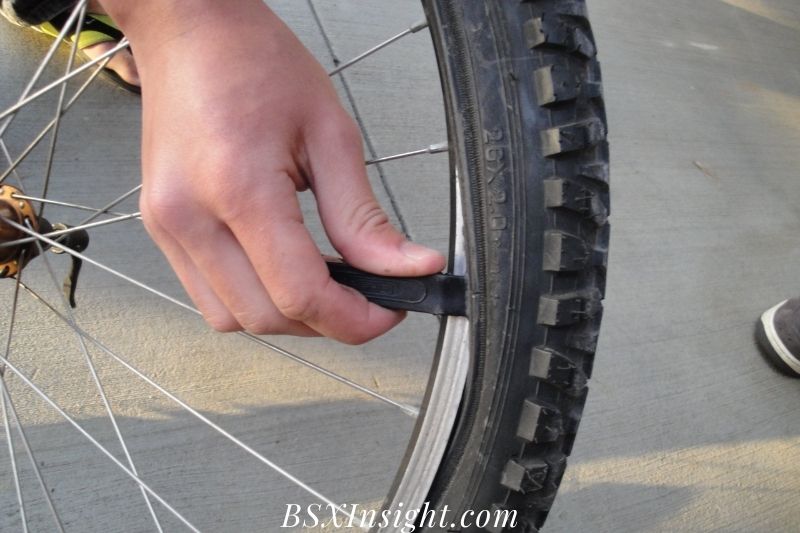
STEP 4: Unhook The Tire From The Wheel With Tire Levers.
It will still be challenging to get the deflated tire off the wheel rim. Utilizing leverage, lift the tire’s edge out of the rim after sliding a tire lever between the rim and the tire. Use a second tire lever on a different area of the tire after securing the first tire lever to the wheel spokes. Till the entire side is free, maneuver the second tire lever around the wheel rim. You should now have sufficient room to reach into the tire and remove the inner tube.
After removing the inner tube, you should be able to roll or twist the tire over the edge of the rim with your hands in order to separate it from the metal wheel. Once the tire is loose, work your way around the outside of the wheel to release it.
Then, check the tire for any significant damage. In many circumstances, only the inner tube needs to be changed; however, if the outer tire has sustained significant damage, it also needs to be changed.
STEP 5: Fill The New Tire Tube With Air.

Remove the dust cap, lock ring, and valve cover before removing the replacement tube from the box. To inflate the new tire tube, unfold the tube and inspect it for any prior damage before attaching it to a bicycle pump or tire inflator. Fill the tube only partially at this time.
To help the tube maintain its shape and prevent damage from pinching, bending, or twisting the tube while reinstalling it, the air is added at this point. Any minor components should be put in a secure location to prevent loss.
STEP 6: Inspect and Refit The Tire.
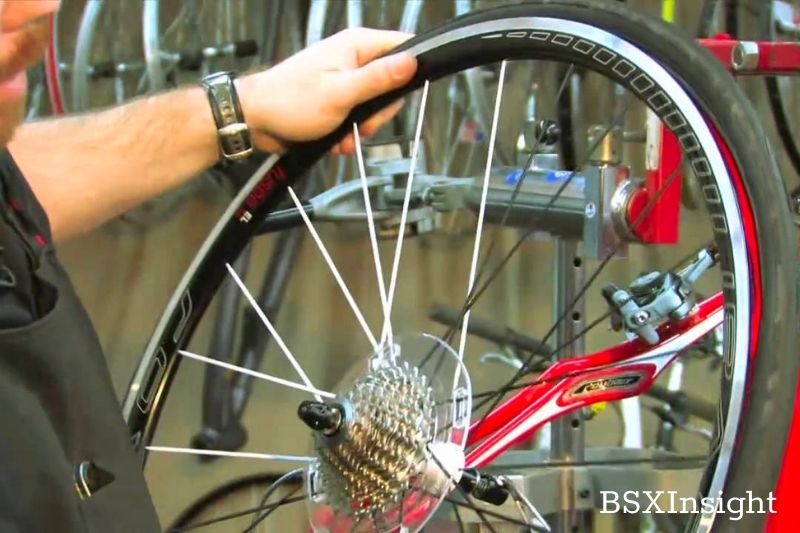
It is advised to check the interior and outer walls of the tire for any existing damage, extreme wear and tear, or sharp items that could cause more damage before inserting the inner tube, whether you are fitting a new tire or an old tire with a new inner tube. Make sure the tread is facing the right way before reinstalling one side of the tire on the wheel rim.
Insert the inner tube into the hollow space between the tire and wheel rim, then feed the air valve via the valve hole. Twist the tire’s outside edge so that it slides into the wheel rim while the tube is in place.
The tire will be more pliable if you start close to the valve and end across from it. In order to place the final segment, where the tire is the tightest, you may need to use a tire lever or release some air from the inner tube if the tire is too resistant. Additionally, if your bike has a valve retention nut or lock ring, don’t forget to replace it.
STEP 7: Reinstall The Wheel After Fully Inflating The Inner Tube.

To fully inflate the inner tube, use a bicycle pump or a home air compressor. If the tire’s PSI is not marked, you can find the recommended air pressure by consulting the bicycle’s handbook or the manufacturer’s website. Remember to replace the air valve cap to prevent unintentional tire deflation while using the vehicle.
Reinstall the wheel by sliding it onto the bicycle and tightening it with the wheel nut or quick-release lever, as appropriate. If you changed the rear tire, reattach the brake wires and raise the chain back onto the gears. Place the bicycle upright and test the repair with a brief ride after rotating the wheel to make sure it spins freely.
Make careful to remove any outdated components and recycle any old tires in your community. There are initiatives in place at several auto and bicycle businesses to take used tires and tubes.
FAQs
You can remove the wheel and change an inner tube, right?
The inner tube can be replaced or patched if a tire is punctured. You must remove the wheel from the bicycle to replace the inner tube. To patch the inner tube, you only need to expose it, and you don’t even have to remove the wheel. Quick-release wheels are more accessible to remove and replace than those with axle nuts.
How much does it cost to replace a bike inner tube?
The price of a set of inner tubes is typical $8. Extra-long valves, thorn-proof tubes, and other unusually sized tubes may cost more. Bikes with total chain cases or internally geared hubs are more expensive because they take longer, are more complicated, or have fewer components.
Change a bicycle tube in what amount of time?
If you remove the source of the puncture, it is possible to bike ride a tire with a hole in it on a new tube. If this is the case, you’ll need to get a new tire. The entire process should take no more than 1-2 minutes.
When a bike is not in use, what causes the tires to go flat?
Tires deflate over time when they are not in use. This occurs because of the tube’s permeability and the small size of air molecules. The tube and the valve seal slowly allow air molecules to pass through. When it’s hot, there is more air pressure, which speeds up the process a little.
How often do you need to replace your inner tube on your bike?
How often should inner tubes be replaced? It would help replace inner tubes whenever you change tires or when they stop holding air. It’s a brilliant idea to replace inner tubes after about 2-4 years of hard riding.
How long does it take to change a bike inner tube?
An experienced cyclist might only need 7 minutes, but a novice who has never worked on a bike before might need 20 minutes or more.
How can I determine which inner tube I require?
You can check the sidewall of your tire to determine what size inner tube is needed. Sidewall numbers printed by tire manufacturers indicate the size of the inner tube. For example, a road bike might have 700x23c and a 26×1 for its size. 75 is for mountain bikes.
How can I determine the size of my inner tube for my bike?
The size information is usually found on the sidewalls of the tires. The inner tubes usually state the wheel diameter and the width they are compatible with, such as 26 x 1.95-2.125″. 26 x 1.95-2.125″ indicates that the inner tube will fit 26-inch tires with widths between 1.95 and 2.125 inches.
Video
Conclusion
Now that you’ve learned how to change a bike’s inner tube, You’re ready to hit the road and get back there. Congratulations on your new skill! If you have any more questions, let BSXInsight know in the comments section below!