- No Voice
Assuming you would like tips on charging a fitness tracker: Fitness trackers are becoming increasingly popular as people look for ways to become more active and monitor their health. While most trackers come with a USB charging cable, you can do a few things to extend the life of your tracker and make sure it is always charged and ready to go.
BSXInsight will show you a few tips on how to charge fitness tracker in this article. When you have a tracker, you need to make sure that it’s charged and ready to go to keep track of your progress.
How To Charge Fitness Tracker
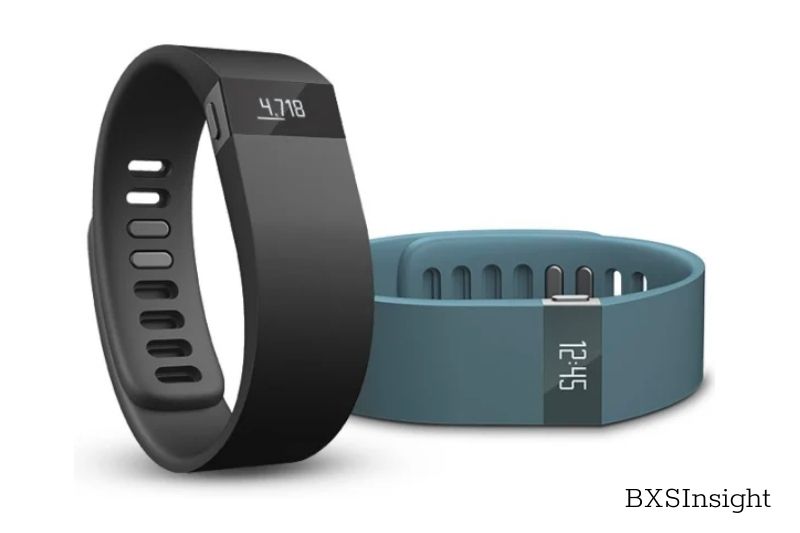
You’re not the only one considering replacing your traditional wristwatch with a fitness monitor. These devices have many advantages. Some models can track your steps and track your sleep. Others have GPS capabilities that allow them to pair with smartphones. These watches can also be used to track time and replace the wristwatch.
![]()
A traditional wristwatch may last several months before it needs a new battery. However, a fitness’s battery must be charged every few days. The fitness tracker will stop working if you don’t charge it.
There are many ways to ensure your tracker is charged up and running at its best.
How Long Does It Take to Charge?
A fitness tracker is a device that is worn on the body that tracks and records data about physical activity. There are many different types and brands of fitness, each with its own specific features and capabilities. The time it takes to charge a tracker depends on the type and brand of tracker and the power source used. Some trackers can be charged within 30-60 minutes, while others may take up to several hours. If it is taking longer, check the connections to ensure they’re tight, allowing the battery to draw maximum power.
Hardware Is Required
Most trackers require a particular type of charging cable. The tracker should come with a specific type of charging cable. However, cables can fail or break after a while, so you might need to get a new one.
As well as the original manufacturers, third-party companies can make replacement charging cables to fit trackers. The cable will work with any tracker as long as it is compatible.
You will also need a USB wall adapter. Most tracker charging cables can be plugged into a USB adapter. This then plugs into standard wall outlets. Some trackers come with the adapter for USB wall outlets, while others don’t.
Charge A Fitbit Charge 4
Fitbit Charge 4 uses a clip-style charging cable to charge the rechargeable battery of the tracker.
Pinch the clip attached to the charging cable to open the gap at the clip’s front. The clip’s front edge has a slight lip to allow it to wrap around the edges. The clip’s side has an oval-shaped opening that wraps around the Fitbit control button without touching it. This will enable you to align the clip and cable visually.
A charging status indicator will appear on your screen when the clip is attached correctly and connected to the power cable.
The Charge 4 charging cable will not work with the Fitbit Charge 3 if it is compatible. The Charge 4 cable has gray markings at the clip mechanism’s bottom, while the Charge 3 has no such markings.
Charge A Fitbit Charge 5
Connect the charging cord to your computer’s USB port, a UL-certified USB wall charger, or another low-energy charging source.
Hold the other end of the charging cable near the tracker’s connector on the back until it magnetically sticks. Check that the pins on the charging cord match the ports on the rear of your tracker.
It takes roughly one to two hours to charge completely. While Charge 5 is charging, double-tap the screen to switch it on and check the battery level. Swipe right on the battery screen to utilize Charge 5. When the tracker is fully charged, a solid battery icon appears.
Charge an Apple Watch Series 6
The Apple Watch Series 6 charging cable is required to set up the fitness tracker. This model uses a different charger cable than other trackers. It plugs into the port on the back of the tracker. It attaches to the back of your watch using an open port and a magnet. This ensures a snug fit.
Place the watch back on the charger. The watch will chime when it is connected to the charger. It should display a green lightning symbol on the watch’s face to indicate charging.

When the watch is charging, you’ll see the red lightning symbol. Swipe up to access the Control Center. To check how much battery life the Apple Watch still has, you can see the remaining power. To see the battery percentage remaining, tap the Battery menu.
Tap the Settings icon on your Apple Watch face to ensure that it is charging efficiently. Next, tap the Battery menu and then Battery Health. To get the highest level of charging, turn on Optimized Battery Charging.
This is no different from how to charge the Apple Watch Series 7 and Apple Watch Series 8.
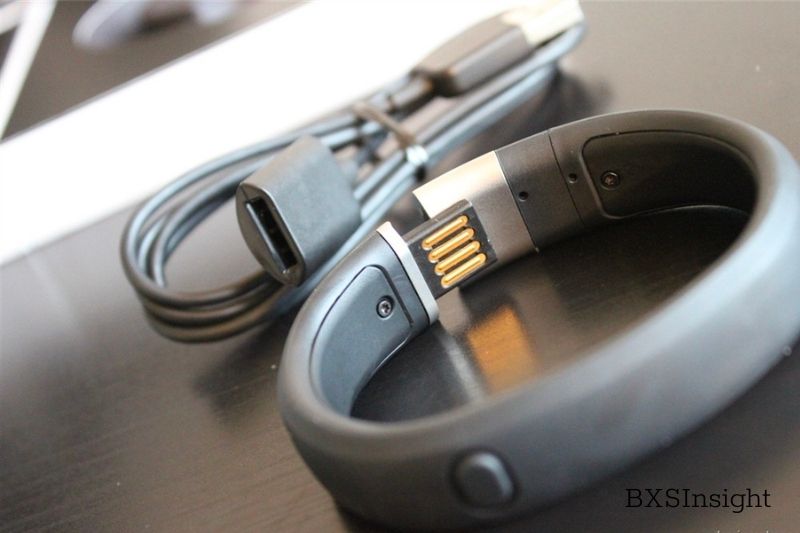
Charge A Garmin Vivosmart 4
You will need either a Vivo smart4 charging cable or a compatible one to charge your Garmin Vivo smart 4. The cable has a USB connector at one end and a clip-shaped charger.
To make the clip’s front end wider, pinch the ends of the clip towards each other. The clip’s edges should wrap around the edges and edges of the Vivo smart 4, holding the charger against the tracker.
The clip’s interior has contacts at its end, which should fit into the tracker’s receptors. The clip should be snugly attached to the tracker.
If your charger doesn’t work, ensure that the contacts at each end of the clip don’t bend or have corroded.
This also works on Garmin Vivosmart 5.
Charge A Samsung Galaxy Watch Active 2
Samsung Galaxy Watch Active 2 needs a unique charging stand explicitly made for Samsung fitness track watches.
The base of the charging stand is a circular one with a vertical section. The cable can be plugged into the back of the charging station and the other end to a USB wall adapter.
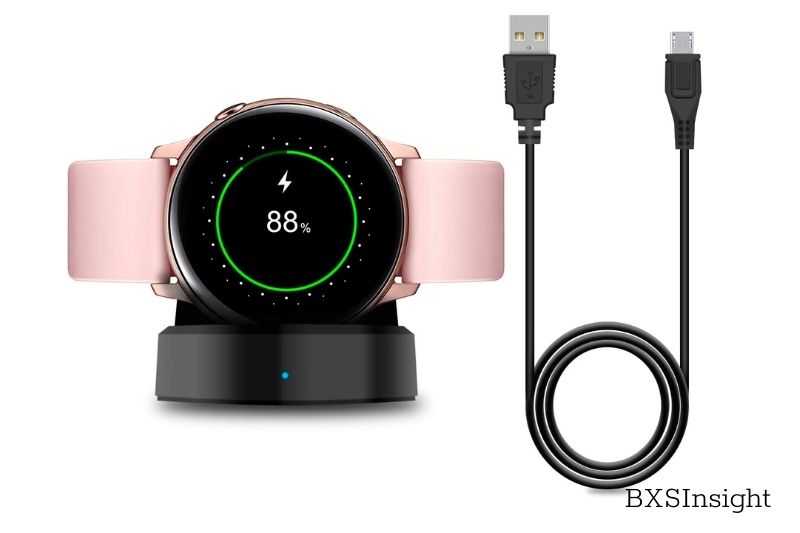
The Galaxy fitness tracker can be charged by aligning the back of your watch with the vertical portion of the charging stand to begin charging. Stability is achieved by placing the watch face’s round edge on the base of the charging station.
A small light on the front of the charging station indicates the charging status. The charging rate is characterized by a red or green light. The charging dock may be faulty if the light flashes red.
This instruction can also be used for Samsung Galaxy Watch Active 3, Samsung Galaxy Watch Active 4, and Samsung Galaxy Watch Active 5.
Charge A Fitbit Versa 3
It is crucial to keep the Fitbit Versa 3 fully charged. The large screen on the Fitbit Versa 3 requires more power than other trackers. The Versa 3 charging cable is compatible with older Versa models.
The charging cable dock is square and has rounded corners. It matches the Versa 3 tracker’s back. To ensure a successful charging process, the dock has a magnet that you can align with the back of your Versa 3 fitness tracker.
The unit will display the current percentage of battery power as it charges. This allows you to see how the charging process is progressing. If you don’t see any charging progress, the dock may not be appropriately aligned with the tracker.
This instruction is also applicable to Fitbit Versa 4
Charge A Jawbone UP Band
You can quickly check the charge of your UP band by pressing the button and then looking for the red status light. If the battery of your UP band is less than 10%, it will vibrate three times faster, and the red sun will shine.
These steps will allow you to charge your UP band.
1. Connect the charging cable to a USB port on your computer.
2. Take off the Jawbone logo cap and attach the band to the other end.
3. The Sun status light pulses when the UP band charges and glows brightly when fully charged.
4. The band takes around 80 minutes to charge fully. The battery should last for about 10 days before it needs to be charged again.
Charge A Nike+ FuelBand
If your FuelBand battery runs low, you will see a battery icon when you press the button.
A plug-in icon will appear if your battery is low. It would help if you plugged the FuelBand into your computer to recharge it.
1. You have two options to connect your FuelBand to your computer: either by using the supplied a cable or directly.
2. The FuelBand display will show a battery icon that fills up to indicate how full your battery is.
3. The battery takes approximately three to four hours to charge fully.
Change The Batteries Of A Misfit Shine
The Shine must be replaced every four months.
The Shine packaging contains a unique tool to replace batteries. You can also use a flathead screwdriver or an eyeglass repair screwdriver.
1. Put the screwdriver or tool provided in the notch at the back of Shine and then lift the cover.
2. Use the magnetic clasp in the Shine packaging to remove the old battery. Pull the magnetic clip from the Shine packaging and place the large end of the clasp on your battery.
3. Place the battery’s positive side down on the back cover.
4. Close the cover by aligning the notch on your back cover with the “12” mark inside the Shine.
Charge The Fitbit Force
Logging into Fitbit.com and clicking on the gear icon in the upper-right corner of Fitbit.com will allow you to check the battery level.
These steps will help you recharge your Force.
1. The charging cable can be plugged into either a USB port on your laptop or into a USB wall charger cube.
2. Connect the other end to the Force’s port.
3. The charging progress will be indicated by a battery icon displayed. The battery takes approximately an hour and a quarter to charge fully. The battery should last between seven and ten days before it needs to be charged.
Charge A Fitbit Flex
Logging into Fitbit.com and clicking on the gear icon in the upper-right corner of Fitbit.com will allow you to check the battery level.
These steps will help you recharge your Flex.
1. Connect the charging cable to the USB port of your computer.
2. Take the Flex tracker out of the wristband.
3. Insert the tracker into the charging cord by aligning the three dots with the rods of the charging cables. Push the tracker into place until you hear a click.
4. One flashing light should be visible. As you charge more, you will see more sunshine.
5. Your Flex may take up to three hours to fully charge. The Flex should last for five days without needing to be charged.
How to Charge Fitness Band Without Charger?
You’ll need to use a USB cable to charge your fitness band without a charger. Plug the cable into the charging port on the back of the band, and then plug it into a power source. Once the band is connected to the power source, the charging indicator will turn on and begin charging.
Conclusion
Once you purchase your fitness tracker and the charging cable, recharging your fitness tracker will only take a few moments. You should make sure that your fitness tracker is charged before going to bed so that you don’t have to worry about the device running out of battery. The most common way to charge a fitness tracker is with the USB charging cable that comes with the tracker. BSXInsight Hope you enjoy it.