
A bike helmet is a must-have for any rider, whether they are a casual rider who likes to ride their singlespeed into town or an enduro athlete getting ready for their next off-road adventure.
So, to get the most protection from your bike helmet, you need to make sure it fits you right. We’ll show you how to measure for a bike helmet in this guide.
About Helmet Sizes
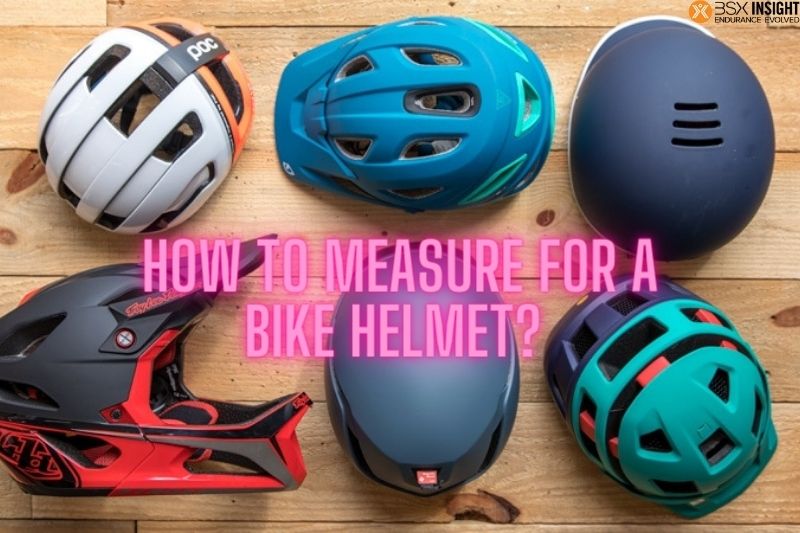
Put a flexible tape measure around your head at its widest point, which is usually about an inch above your eyebrows.
This will give you your head circumference. You could also wrap a string around your head and use a yardstick to measure the length.
Bike helmet sizing parameters:
- Very small: less than 20 ” (51cm)
- Small: 20″–21.75″ (51cm–55cm)
- Medium: 21.75″–23.25″ (55cm–59cm)
- Large: 23.25″–24.75″ (59cm–63cm)
- Extra large: above 24.75 ” (63cm)
- One size fits all: has a fit system that can be changed a lot
How To Measure For A Bike Helmet?
1. Measure Your Head
It is essential to use the appropriate measuring tool when purchasing a bike helmet.
A fabric tape measure is preferable to use when determining the size of your head or when measuring for a bike helmet.
You can wrap it around your head so that it sits about an inch above your eyebrows and your ears. It is essential to wrap the measuring tape around the broadest part of the back of your head when taking your measurements.
In this way, you will be able to calculate the appropriate amount of centimeters for your head size.
2. Try it On
Right after you get your new helmet, you should put it on. When you put on your helmet, it should sit flush with the top of your head.
To prevent head trauma, the helmet’s front should sit an inch or less above the wearer’s eyebrows.
Adjust the fit of the helmet using the retention system (located in the back, usually a click wheel or a ratchet system).
It is important that the helmet fits snugly on your head. It’s important that the helmet fits snugly around your head.
Indications of pressure points may indicate that the helmet is too small.
3. Buckle Up

Fasten the chin strap so that it fits snugly but comfortably under your chin. The strap should fit snugly around your chin, with no more than a finger’s width between your chin and it.
The straps should form a “V” shape under your ears.
While wearing the chinstrap, keep your mouth open. The top surface of the helmet should be in contact with your scalp.
4. Shake Test
In this step, after putting on the straps then, you shake the helmet. You should move your head in all directions and back and forth.
Make certain that the product does not move a millimeter in any direction. Check to see if the straps are loose and if they are interfering with your comfort.
5. Ready To Ride
During rides or long periods of travel, the straps on a bike helmet can become undone. Before every outing, give your helmet a quick shake test. In that case, you’re all set to hit the road!
Tips to Adjust The Fit Of A Helmet
First, adjust the tightness
After placing the helmet on your head, many models feature an adjustment wheel that can be twisted to a snugger fit.
(There are a variety of fit systems available; some helmets even have removable, replaceable interior foam pads that allow you to fine-tune the fit.)
Next, buckle and tighten the chin strap
When properly adjusted, the straps will rest in a V shape under each ear. (If the V doesn’t sit right, readjust the buckles under your ears.)
Finally, with the chin strap buckled, open your mouth wide
The helmet’s topmost part should be touching your scalp as you do this. If not, try again after snugging the strap slightly. (Just make sure the strap isn’t too tight to cause pain.)
Type of Bike Helmet
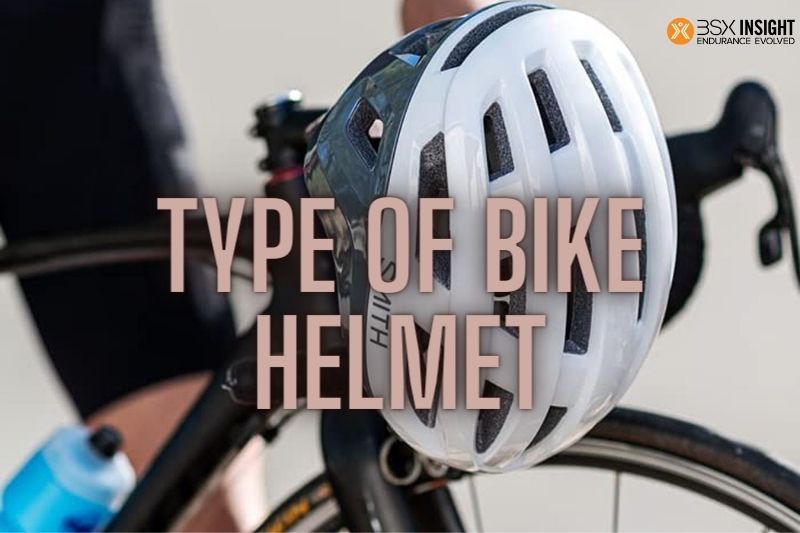
Half Shell
By far, the most common type of helmet sold today is the half-shell. There are a lot of different styles and types of half-shell helmets on the market.
Some are lightweight and have a lot of vents, while others are more rugged and have a lot of coverage for off-road adventures.
Mountain bikers like “plus” half-shell helmets because they protect the back of the head, temples, ears, and jaw better.
Roadies and commuters, on the other hand, like “standard” half-shell helmets because they let in more air and cover less of the head’s crown.
Full Face
Full-face helmets provide the most comprehensive protection.
Full-face helmets, which are made up of a solid one-piece shell and a full jaw guard, offer adequate protection but are typically heavy and uncomfortable.
Riders of downhill mountain bikes who are willing to risk a hard fall typically wear full-face helmets.
Choices in Bike Helmet Features
Ventilation
To keep you cooler and more comfortable while riding, vents in your helmet direct airflow over your head. Adding more vents to the helmet will also make it more lightweight.
Visor
Many cyclists prefer riding in the shade, so visors on their mountain bike helmets are a popular accessory.
Full face protection
Some mountain bike helmets have a chin bar that completely encases the face, making them ideal for downhill mountain biking and racing.
Mount compatibility
There are helmets that are designed to have a mount snapped in for use with an action camera or a light (sold separately).
When Do you Need to Replace Your Bike Helmet?
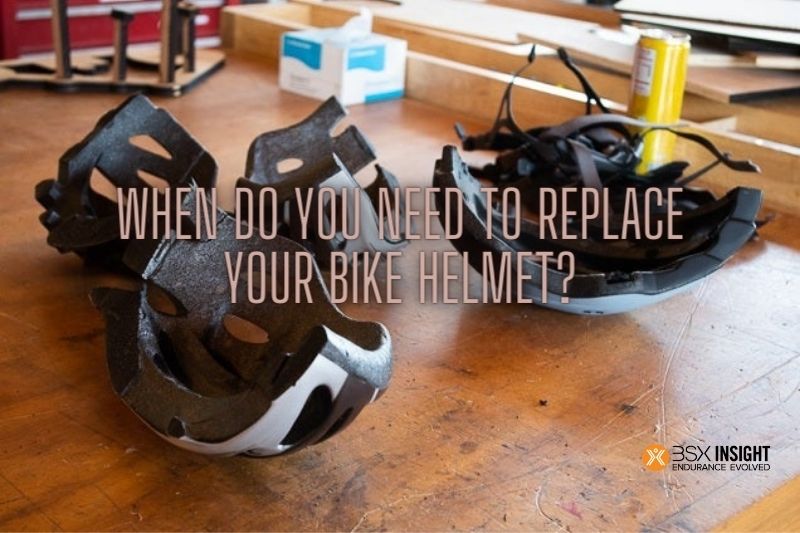
Crash
Getting a new helmet is recommended after a major crash or if you were struck in the head during a bicycle accident. Before deciding to replace it, make sure there are no cracks in it. If there aren’t any, there’s no need to buy a new one.
Even though helmets were designed to be used only once, repeated blows to the head would often render them useless. For this reason, it is not as sturdy or protective after an accident as it once was.
High Levels of Environmental Risk
Helmets made in the 1990s and later may not have to be replaced after all. Let’s start by looking at the criteria it meets as stated on the sticker inside.
If the helmet is ASTM (American Society for Testing and Materials) or Snell certified, you know it was built to current impact protection standards, and you might even find out that Consumer Reports gave it a thumbs up.
Even if it’s just a marketing gimmick, many firms now recommend swapping out helmets every five years.
As for salt water, neither EPS nor EPP nor EPU foam degrades with perspiration, and the regulations forbid perspiration-degrading helmets.
Your helmet will become filthy from your own sweat and dirt as its life nears its end. However, prolonged exposure to sunlight can shorten the life of the case.
Because of the time spent outdoors while wearing them, manufacturers often include UV inhibitors in plastic to manage UV attenuation in helmets.
If you notice discoloration or tiny cracks in the vents of your helmet, the UV inhibitor may have failed.
Fitting
You should get a new helmet if the old one is too big or too small for your head. A helmet can only protect your noggin if it snugly rests atop your noggin.
In the event of a collision, your helmet will provide no protection if it is either too large or too small for your head. Therefore, we highly suggest two different sizes of helmets, one for those with larger heads and one for those with smaller heads.
Evolution of Technology

Don’t risk your safety by using a helmet from the ’70s that lacks a foam liner; replace it right away. A variety of leather “hair bands,” including the Skidlid (foam), Pro-tec (foam) from the 1970s, the Brancale (no foam), etc.
For obvious reasons, helmets produced before 1984, when the ANSI standard was first put into place, do not offer the same level of protection as those produced after.
Helmet technology has come a long way since the 1970s, when it was arguably at its peak. It’s possible that the 1970s and 1980s Bell Bikers, Bailens, MSRs, and Supergos all need to be replaced with newer models.
The exterior is top-notch, but the interior foam does not meet modern ASTM or Snell standards.
We recommend replacing your all-foam helmet from the ’80s (with a cloth cover) with a modern model.
Recent laboratory studies confirmed what common sense would suggest: bare foam does not slide well on pavement and can cause a startle reaction in an accident.
How to Clean a Bike Helmet?
Use some gentle soap and water to clean your helmet. Some riders are even rumored to have taken their helmets into the shower with them, but any sink or bathtub will do.
It really couldn’t be easier than that. Wash it gently with water and some mild soap. You can use any kind of sink or bathtub, but some riders even bring their helmets into the shower with them.
It is suggested that you hand wash the pads of your helmet in cold water using a mild detergent.
You can put them through a cold water gentle cycle wash in the washing machine, but they may get ruined. Pads should not be dried in a dryer.
The air should be allowed to dry them. You should probably get new ones if the old ones are too damaged to use.
Apply some water and mild soap to the straps and wet them thoroughly. In order to clean the straps, simply give them a quick rub.
White or other light-colored straps need extra scrubbing in the washing machine because they show every bit of dirt and sweat.
FAQs

Are bike helmets one size fits all?
Size it up: Lower-priced helmets are often one-size-fits-all; you simply adjust an internal strap to get the helmet snug.
Higher-priced helmets are available in a range of sizes. To learn what size you need, measure your head: wrap a tape measure around your noggin just above your ears.
How do you measure your head for a cycle helmet?
You want to wrap the tape measure around your head above your eyebrows and your ears. Make sure it goes around the largest part of the back of your head too. This will give you the circumference of your head in centimeters.
How do you measure your head for a helmet without tape?
If you don’t have a flexible, non-stretchable measuring tape, you can use a non-stretchy piece of string. Wrap it around the head as suggested and mark it to indicate the circumference. Next, lay the string out on a flat surface and use a ruler to measure it.
How do I know if my bike helmet is too tight?
Push the helmet side to side, then front to back, and give it a twist. (The skin at your temples should wrinkle.) The helmet should move only a little bit.
Conclusion
The purpose of bike helmets is to shield your head in the event of a collision. However, your safety may still be jeopardized if it isn’t fitted properly.
Thankfully, we have this helpful size guide for bike helmets. We’ve simplified and condensed each step.
I hope they prove useful in your search for a new bicycle helmet and appreciate you taking the time to read this. In order to support us out even more, check out Bsxinsight for information on bikes, gym gear, and healthy living.