Bike lights are essential accessories for any cyclist, whether commuting in the city or hitting the trails. Not only do they improve your visibility and safety on the road, but they also help you see where you’re going in low-light conditions.
However, mounting bike lights can be a bit daunting for those new to cycling or have never installed them.
In this article, BSXInsight will guide you through the process step-by-step on how to mount bike lights so that you can stay safe and visible on your rides.
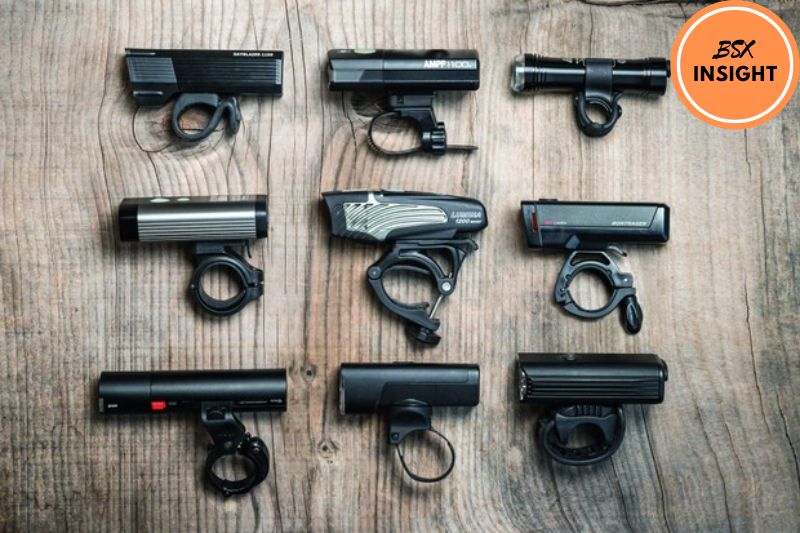
Most Popular Types of Light Should Use Today
- Axle Mounts: Axle mounts are popular among mountain bikers and commuters because they provide a secure attachment to the bike frame. These mounts attach to the axle of the wheel, ensuring that the light stays in place even on rough terrain.
- Eyelet Mounts: Eyelet mounts are commonly used on road bikes and touring bikes. They attach to the threaded eyelets on the bike frame, which are typically located on the fork or seat stays. These mounts provide a secure and stable attachment point for the light.
- Handlebar Mounts: Handlebar mounts are the most popular type of bike light mount. They attach to the handlebars of the bike and are ideal for commuters and urban cyclists. These mounts are easy to install and provide a good balance of visibility and convenience.
- Steerer Mounts: Steerer mounts attach to the steerer tube of the bike’s fork. They are popular among mountain bikers and provide a low-profile mounting option that won’t interfere with the bike’s suspension.
- Aerobar Mounts: Aerobar mounts are designed for triathlon and time trial bikes. They attach to the bike’s aerobar and provide a streamlined, aerodynamic mounting option that won’t add unnecessary drag.
- Brake Stud Light Mount: Brake stud mounts attach to the brake stud on the bike’s frame. These mounts are popular among commuters and provide a secure attachment point for the light.
- Anywhere Mounts: Anywhere mounts are versatile and can be attached to almost any part of the bike frame. These mounts are ideal for riders who need flexibility in their mounting options.
- Use Your Seat Pack Webbing: Some bike lights come with a strap that can be attached to the webbing on your seat pack. This convenient mounting option won’t interfere with your bike’s aerodynamics.
- Seatstay Battery Lights: Seatstay battery lights attach to the seat and stay on the bike frame. They provide a low-profile mounting option and are ideal for commuters and urban cyclists.
- Seatstay Dynamo Lights: Seatstay dynamo lights attach to the seat stays and are powered by the bike’s movement. These lights are ideal for touring cyclists and provide a sustainable, eco-friendly lighting option.
How To Mount Bike Lights?
1. Mounting a Rear Bike Light:

Mounting a rear bike light is a relatively simple process. Here are the steps you need to follow:
- Choose the right spot on your bike frame to mount the light. The rear light should be mounted on the seat post or the rear of the bike frame. Make sure that the spot you choose is visible to drivers behind you.
- Attach the mounting bracket to the light using the screws provided. Most bike lights come with a mounting bracket that you will need to attach to the light itself.
- Slide the bracket onto the seat post or rear of the bike frame and tighten the screw to secure it in place. Make sure that the bracket is snugly attached to the bike frame so that the light won’t move around during your ride.
- Adjust the angle of the light so that it points directly behind you. This will ensure that the light is visible to drivers behind you. You should also make sure that the light is angled slightly downwards so that it doesn’t blind other cyclists or pedestrians.
2. Mounting a Front Bike Light:
Mounting a front bike light is also a simple process. Here are the steps you need to follow:
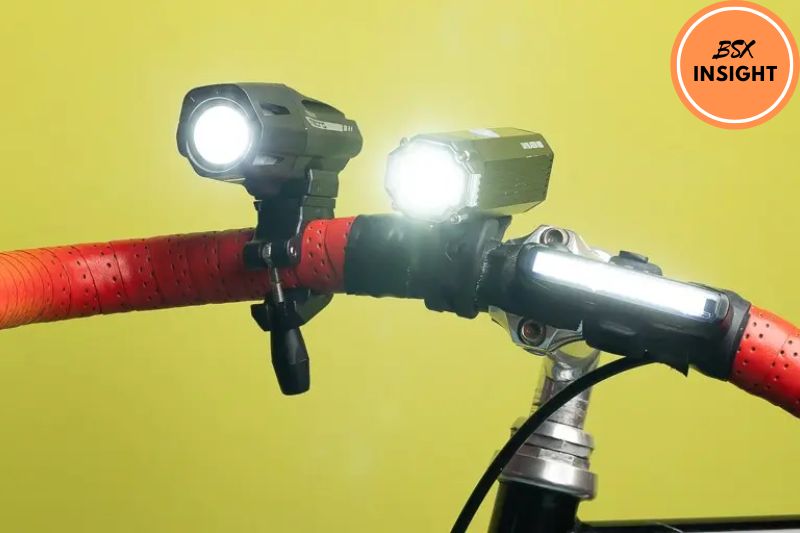
- Choose the right spot on your bike handlebars to mount the light. The front light should be mounted on the handlebars, close to the stem. Make sure that the spot you choose is visible to drivers in front of you.
- Attach the mounting bracket to the light using the screws provided. Most bike lights come with a mounting bracket that you will need to attach to the light itself.
- Slide the bracket onto the handlebars and tighten the screw to secure it. Make sure that the bracket is snugly attached to the handlebars so that the light won’t move around during your ride.
- Adjust the angle of the light so that it points straight ahead. This will ensure that the light illuminates the road or trail ahead of you without blinding oncoming traffic.
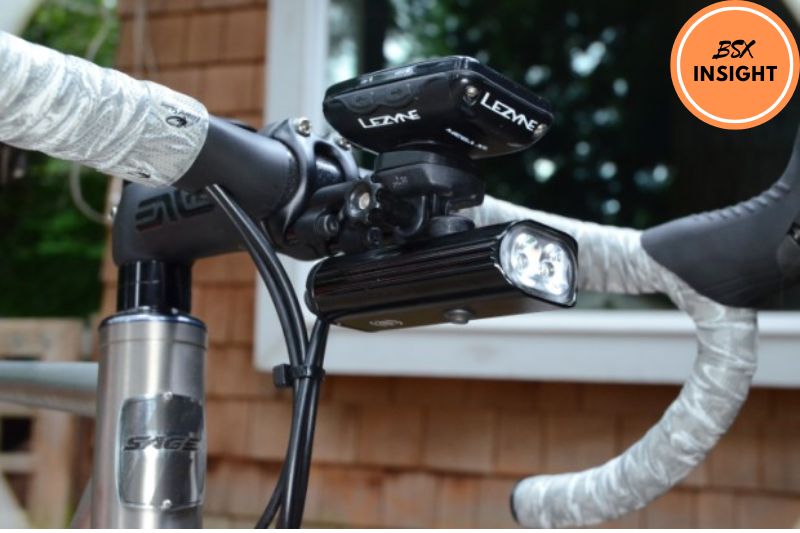
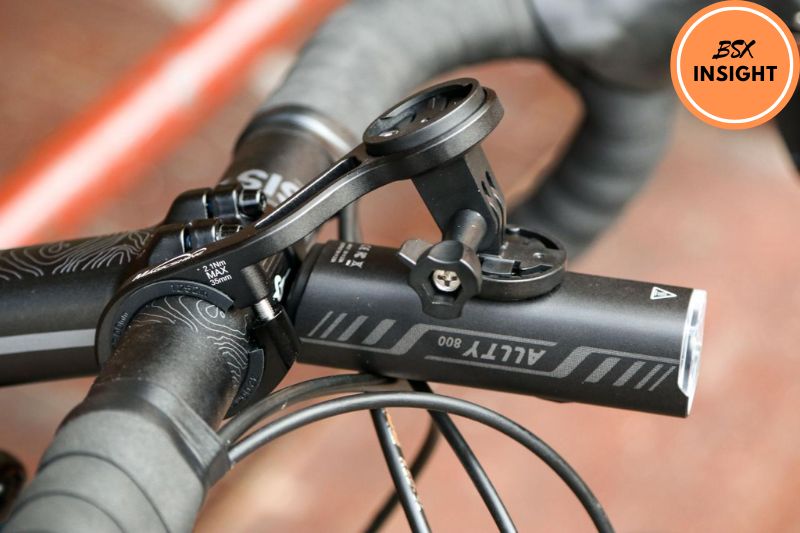
3. Handlebar Mounts:

Handlebar mounts are a popular option for mounting bike lights. Here are the steps you need to follow:
- Choose the right handlebar mount for your light. Most lights come with a mount that is compatible with standard handlebars. However, some mounts are designed for thicker or thinner handlebars, so make sure you check the specifications before purchasing one.
- Attach the mount to the light using the screws provided. Most bike lights come with a mount that you will need to attach to the light itself.
- Slide the mount onto the handlebars and tighten the screw to secure it. Ensure the mount is securely fastened to the handlebars, as a loose mount can cause the light to move or fall off during your ride.
- Adjust the angle of the light so that it points in the direction you want. Ensure that the light is angled correctly to illuminate the road or trail ahead of you without blinding oncoming traffic.
How to Remove Your Lights For Charging and Cleaning?
When it’s time to charge your bike lights or clean your bike, you’ll need to remove the lights from the bike. Here are the steps to do so:
#Step 1: Turn off the Lights
Before you remove the lights, make sure that they are turned off. This will prevent accidentally pressing the switch and wasting battery life.
#Step 2: Remove the Light from the Mount
To remove the light from the mount, press the release button or lever and slide the light off the mount. Some mounts may require twisting the light to release it from the mount.
#Step 3: Charge or Clean the Light
Once the light is removed from the mount, you can charge it using a USB cable or clean it with a damp cloth. Make sure to follow the manufacturer’s instructions for charging and cleaning.
#Step 4: Reinstall the Light
Once the light is charged or cleaned, reinstall it onto the mount by sliding it back onto the bracket and clicking it into place. Make sure that the light is securely attached and facing in the correct direction.
Tips To Choose Where You Want to Position the Lights
1. Safety
The primary function of bike lights is to enhance safety while cycling. Therefore, it’s essential to position the lights where they can be seen by other road users, including drivers, pedestrians, and other cyclists.
The front light should illuminate the road ahead, and the rear light should be positioned to make you visible from behind. When choosing the position of your lights for safety, consider the height and angle of the light.
Mounting the front light too high or too low may interfere with your view of the road or fail to illuminate the road ahead adequately. Similarly, mounting the rear light too high or too low may not make you visible to drivers approaching from behind.
2. Comfort
While safety should be your top priority, it’s also important to position the lights so they won’t interfere with your comfort while cycling.
For example, a front light mounted too low may interfere with your view of the road, and a rear light mounted too high may obstruct your saddlebag.
When choosing the position of your lights for comfort, consider the placement of your hands and any accessories you may have on your bike.
For example, if you frequently use a bike computer or a GPS device, you may want to position the front light to avoid interfering with these accessories.
3. Appearance
Lastly, the position of your bike lights can also enhance the appearance of your bike. Consider positioning the lights in a way that complements the overall design of your bike, such as matching the color scheme or style.
When it comes to choosing the position of your lights for appearance, consider the shape and design of your bike frame.
Some lights may be more discreet or streamlined, while others may be more bulky or noticeable. Choose the position that makes your bike look the best while still prioritizing safety and comfort.
FAQs
Do I need both a front and rear light?
Yes, it is recommended to have both a front and rear light to enhance visibility and safety while cycling.
Can I mount my bike light on my helmet?
Yes, some bike lights come with a helmet mount option. However, it’s important to make sure that the light is securely attached and not too heavy, which may cause discomfort.
How do I choose the brightness level for my bike light?
The brightness level depends on the riding conditions and personal preference. In general, use a higher brightness level for low-light or dark conditions and a lower brightness level for well-lit areas.
Can I use rechargeable batteries for my bike lights?
Yes, many bike lights come with rechargeable batteries, which can be more convenient and cost-effective in the long run.
How long does the battery last on a bike light?
The battery life depends on the brightness level and usage time. Most bike lights offer different modes and battery life estimates, which can vary from a few hours to over 20 hours.
Can I mount my bike light on the fork or seat post?
Yes, there are mounts available for the fork and seat post, which can provide additional mounting options for your bike lights.
Can I use my bike lights during the day?
Yes, it is recommended to use bike lights during the day as well, especially in low-visibility or high-traffic areas.
How do I know if my bike light is properly mounted?
Make sure that the light is securely attached to the mount and facing in the correct direction. Test the light by turning it on and checking that it is illuminated and visible from different angles.
Conclusion
In conclusion, mounting bike lights on your bicycle is a simple process that can significantly improve your safety on the road.
Following the steps outlined in this article, you can mount your bike lights correctly and ensure they are angled perfectly to provide the best visibility.
Choosing the right type of light for your needs is essential to ensure that your lights are charged or have fresh batteries before each ride.
By correctly mounting your bike lights, you can enjoy your rides with the peace of mind that comes with knowing that you are visible to other road users.
Thanks for your reading!