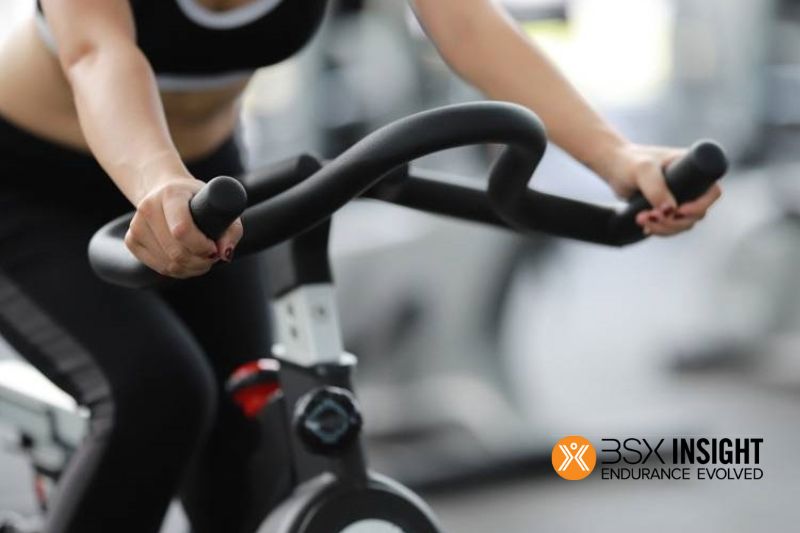
After you’ve fine-tuned your bike to your needs, there’s one more thing to do. Make sure all exercise equipment is locked and safe before you use it.
Before you start your workout, make sure that all of the dials, buttons, and switches are locked in place. Let’s leave things alone because you just spent so much time and effort making them perfect.
No matter if you’ve never ridden a bike before or have been riding for years, Bsxinsight‘s guide about how to set up spin bike and some of the tricks that you should know.
What’s Spin Bikes?
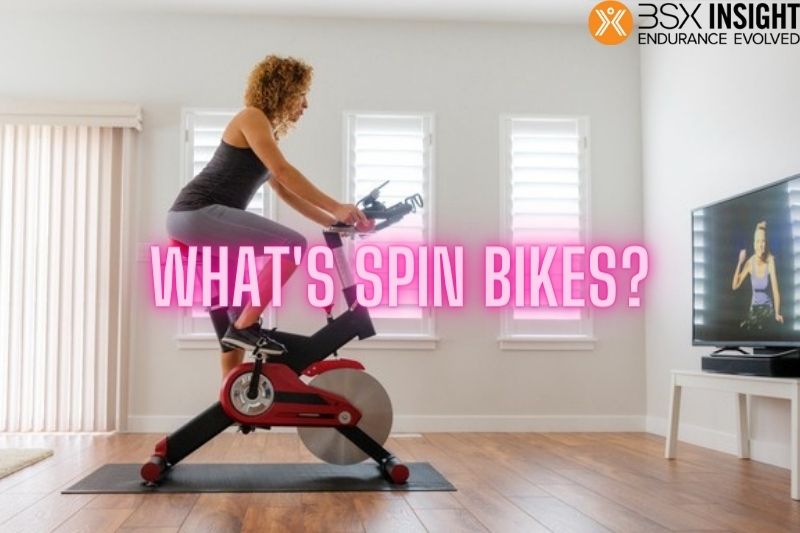
Spin bikes are one of the most common types of exercise bikes that stay in one place. They are also sometimes called stationary exercise bikes or indoor cycles.
Traditional upright bikes and sit-down exercise bikes are the only types of stationary bikes that are still available. There are good and bad things about each of these, but this article is mostly about spin bikes.
The fact that spin bikes look like road bikes makes them stand out. Most people who ride bikes often have probably tried a spin bike at least once in their lives.
There are a number of things that make one spin bike different from another, such as how the seat is made, how the handlebars are made, and how much weight the flywheel can hold.
How To Set Up Spin Bike?
Changing the Seat Height
Put your feet down next to your bike and take a break. You can raise or lower the seat so that your hips are well-supported. If you put your hands on your hips, Karp says you should be able to feel a round bone that goes from front to back. Your iliac crest is right there.
“The seat should be at the same height as the user’s hips. But from here on out, the vast majority of people will need to make more changes.”
Mount the bike, but hold off on inserting your feet into the pedals and cages just yet. You should fully depress the pedal with your heel facing forward, at about the 6 o’clock position.
When you slide your feet into the cages or clip into the pedals, your knee should be perfectly bent, as instructed by Karp.
Five to ten degrees is a good bend angle for that. The key, according to Karp, is that it bends clearly without getting stuck.
Remove your feet from the pedals until your toes are touching the floor. This points to the fact that you are making progress in the right direction.
If it doesn’t reach the floor, you’re sitting too high; if it does, you’re sitting too low. Both a too-low and a too-high seat height can be detrimental to the knees.
Moving the Seat Forward and Back
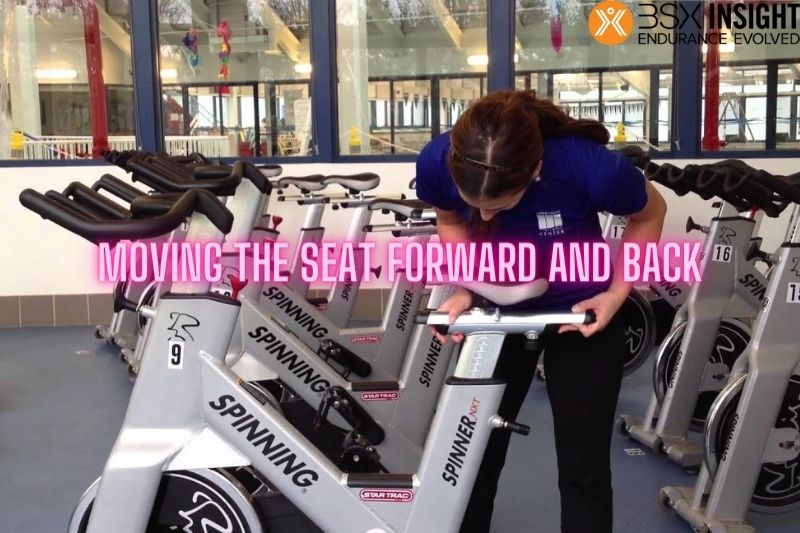
Although some people prefer to have the bike saddle in the center, seats on spin bikes can be moved backward or forwards to accommodate people who are taller or shorter than average.
The goal is to have your knees in the proper position in relation to your feet. Sit in the riding position, with your hands on the handlebars and the balls of your feet over the center of the pedals. Place your feet on the pedals at 3 o’clock and 9 o’clock so that they are even.
Consider your front leg and draw a line from your knee to your ankle. Is your kneecap directly over the center of the pedal? If so, your seat is ready to go.
Rearranging the Handlebars
Change the height and position of the handlebars so that when you’re riding, your shoulders are in line with your elbows and hips.
The best handlebar position is comfortable and helps you ride in a way that is strong and effective. When you get better, you might be able to keep the handlebars at the same height as the saddle (the most effective position in terms of power output).
If you have back problems or are still getting better from an injury, you might want to keep the handlebars a little bit higher. But we suggest that anyone who starts with higher handlebars gradually lowers them to saddle height to improve core strength and workout efficiency.
Increasing or Decreasing Resistance

Find the knob that controls the resistance just below the handlebars.
You’ll find a small knob that can be turned left or right at the very bottom of your handlebars. The knob has a plus sign (+) and a minus sign (-) on opposite sides. In some models, it can also function as a lever, which can be raised or lowered.
If your bike’s brake lever doubles as a resistance adjuster, fully depressing it will apply the brakes and bring the flywheel to a stop. You should always fully depress this when you are finished with your workout and ready to get off the bike.
Some exercise bicycles feature a tiny LCD display that shows the current resistance setting. If you don’t have that, you’ll just have to go by how it feels as you pedal.
To make the resistance stronger, turn the knob to the right.
Apply sufficient resistance to prevent uncontrollable bouncing or spinning. Don’t make the exercise unrecognizable by using an excessive amount of resistance.
Find a comfortable resistance by monitoring your bike’s small dial or LCD screen, which displays your rotations per minute.
If your cadence is over 120 RPMs, you can improve your workout by increasing the resistance and forcing your muscles to work harder.
A hill climb in spin class requires an increase of one or two levels in resistance. The sweet spot for climbing is between 60 and 80 revolutions per minute.
Some bicycles have a resistance lever that, when lowered, increases the difficulty of pedaling.
By gradually increasing the difficulty of your workouts, you can boost your fitness level over time. It’s also a fantastic method of training for a marathon or any other competitive athletic event.
To lessen the resistance, turn the knob to the left.

Pedaling too hard may cause your hips to shift on the seat or your upper body to sway; to ease this, turn the knob to the left. The lever on the resistance knob can be raised a few notches to make the exercise more manageable.
Keep the resistance low at first so you can work up to a more challenging level as your strength increases.
Some bikes’ initial stages are designed to give the illusion of perfectly smooth ground.
The sweet spot for resistance is somewhere between 80 and 110 revolutions per minute (RPM), at which point you will feel comfortable but not overly fatigued.
Last Checks Before Getting Started
Once you have fine-tuned your bike to your specifications, there is one final step to take. Make sure all exercise machinery is locked and secure before using it.
Make sure every dial, button, and switch is locked in place before starting your workout. Since you just spent so much time and energy perfecting things, let’s keep them that way.
Some Mistakes When Set Up a Spin Bike
The seat too low or high
Before you go for a ride, you will measure the distance between the ground and the seat of the bike. Maxwell is right to say that this is the most important thing to think about.
“Because cycling indoors is low-impact, it’s one of the most popular ways to get a high-intensity workout,” she says.
“However, if your bike’s settings aren’t right, this can have a big effect on your ride.” She goes on to explain. The last thing you should be thinking about is putting more stress on your knees and joints because your seat wasn’t set up right.
How to fix this?

A common way to figure out how high a seat should be is to stand next to it and adjust it so that your hips are at the same level.
Maxwell said, “You can also take the measurement by standing barefoot next to your bike and lifting the thigh that is most vertically aligned with the seat. The length of your pedal stroke is roughly equal to the angle at which your leg is placed in relation to the saddle when you’re riding a bike.”
When you’re sitting on the bike, check the seat height again to make sure it’s right and you’re comfortable.
When you’re at the bottom of your pedal stroke, your knee should be bent just a little bit.
Aim for a knee bend of between 3 and 5 percent, which is the point where you can still see the top of your foot when you look down.
Seat too far from or too close to handlebars
The seat’s height and position in relation to the handlebars are both modifiable. The distance between two seats is referred to as the seat distance. “When seated in the saddle, your arms should be able to reach the handlebars with a slight bend in the elbow.
You shouldn’t feel like you’re reaching for the handlebars with your arms completely straight or that your knees are hitting the handlebars “According to Maxwell
How to fix it?
We suggests gauging the space between seats by measuring the length of one’s forearm from the bend of the elbow to the knuckle of the middle finger. Before getting on your bike, place your elbow on the seat and slide it forward until your fingertip touches the handlebar.
Handlebars are too low or high

If your bike’s handlebars are set up right, they will help you ride correctly and give you support.
If the handlebars are too high or too low for your body, you could hurt yourself or have other problems. Maxwell says, “If your handlebars are too low, your lower back will feel tired or sore.”
A low handlebar position can be uncomfortable because it makes you hunch over, which is not a good way to ride.
You should also avoid mounting your handlebars too high. If your arms are too high above the bike seat, this can cause shoulder pain. “It will force you to ride with your shoulders up toward your ears instead of with your chest out and shoulders down,” she says.
How to fix it?
Make sure that the handlebars aren’t too close to your ears and that you can relax your shoulders. Make sure you are not hunched over the bike either.
You should try raising your handlebars if you have pain in your lower back.
“It will make you feel like you can sit up straighter in the saddle and don’t have to bend over to grab the handlebars.
Your handlebars should be about the same height as your seat or a little bit higher ” she says
Death grip on the handlebars
When a spin class is harder than expected, you might hold on to the handlebars for dear life. This could be because the workout is too hard, you can’t keep up with the pace, or the amount of resistance is too high.
You should do the opposite. Ideally, you should spread your weight evenly over the bike so that your core is over the center of your bike
If you put too much of your upper body, wrists, and shoulders on the handlebars, it could hurt your health. Doing this can put too much stress on the quadriceps, which can make the knees hurt.
Wrong foot position/pedaling
Although it may seem like second nature to ride a bike, it’s important to be aware of your form to avoid injury or discomfort. One of the first things to keep in mind is to keep your feet from pointing down.
How to fix it?
Everything needs to be aligned and moving forward. All of your lower extremities, including your knees, toes, and ankles, are facing forward as a result. Always maintain a straight posture, without bending or crossing your knees.
She warns that doing so will cause pain in the IT band all the way down to the ankle.
Keep your feet flat and your toes pointed down when you’re pedaling. It’s best to have a flat foot and lead with your heel, she says, so that your pedal stroke is consistent. Your ankles and feet will feel much better after doing this.
FAQs
Is 30 minutes of spinning a day enough?
If you’re looking to improve your cardiovascular and muscular endurance, then biking for at least 30 minutes a day is a great way to do so. By consistently putting in the effort, you’ll soon see an improvement in your aerobic capacity, which will allow you to bike for longer periods of time or on more intense rides.
Can cycling reduce belly fat?
Cycling is an excellent cardio workout that helps one shed weight and lose belly fat. In addition to being a recreational activity, cycling also has many health benefits. It is a low-impact exercise that can be enjoyed by people of all ages and fitness levels.
How long should beginners spin?
If you’re new to working out, or just getting back into it after some time off, start slow and increase your intensity or time gradually. A good goal to aim for is 10 minutes at a low to medium intensity to start, depending on your fitness level.
You can then increase your time or intensity a bit with each workout. This will help you build up some leg strength and cardio fitness so that your first class won’t seem quite so intimidating.
How long should I cycle a day to lose weight?
The American Council on Exercise (ACE) says in order to lose weight, you’ll need to cycle at a moderately intense level for at least 30 minutes at a time. To burn even more calories, you’ll want to cycle for longer. ACE also suggests incorporating two activities into one cross-training session to boost weight loss.
This could include adding some light resistance training to your cycling routine to really maximize the calorie burn and help you see results more quickly.
Conclusion
Now that you know how to set up your bike and some of the tricks to get the most out of your workout, make sure to lock everything in place before you start.
By following these simple steps, you can be sure that you’ll have a great ride every time. But if you’re ever not sure, a member of our team will be happy to answer any questions you might have about setting up.
Thanks for reading!