Cycling shoes with cleats are essential for serious cyclists, as they allow you to clip into your pedals and pedal more efficiently.
However, installing cleats onto your bike shoes can be intimidating if you’ve never done it before.
In this article, BSXInsight will provide a step-by-step guide on how to install cleats on bike shoes so that you can clip in and ride easily.
We also talk about how to choose the right type of cleats and put them on your shoes so that you can ride smoothly and quickly.
Cleats and Pedals Work: What’s The Difference?

Before we get into the installation process, it’s essential to understand the difference between cleats and pedals.
Cleats are the small pieces that attach to the bottom of the cycling shoe and clip into the pedal. It creates a secure connection between the foot and the bike.
On the other hand, pedals are the platform on the bike’s frame where cyclists place their feet.
Cleats provide a more efficient power transfer from the leg to the pedal, as they lock the foot into place, preventing it from slipping or shifting while pedaling.
This, in turn, allows the cyclist to generate more force with less effort. Pedals provide less power transfer because the foot is not secured in place.
However, pedals are more versatile than cleats, as they can be used with a broader range of shoes and do not require specialized cycling shoes.
What’ll You Need To Prepare?
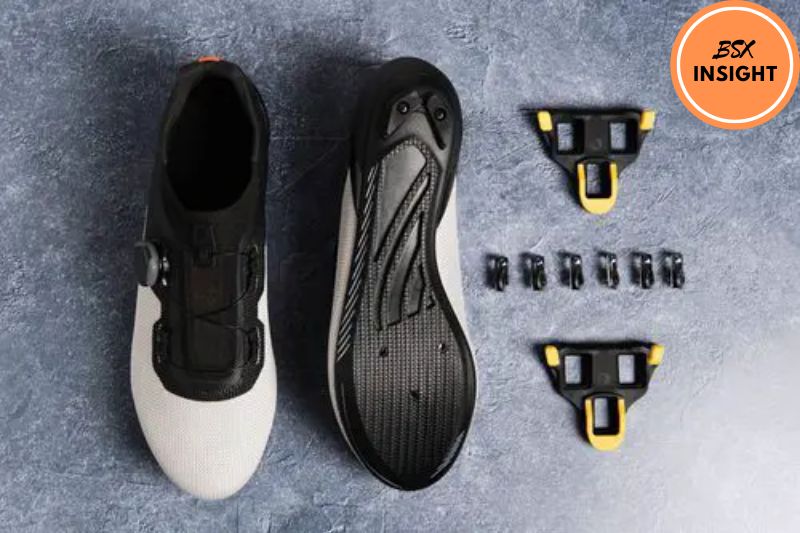
To install cleats on bike shoes, you will need the following materials:
- Cleats: Make sure to choose the right type of cleats for your riding style and pedals.
- Cycling shoes: Ensure your shoes are compatible with your chosen cleats and pedals.
- Allen wrench: This tool is needed to tighten the bolts on the cleats.
- Screwdriver: A screwdriver may be needed to remove any existing cleats from your shoes.
- Ruler or tape measure: This will help you position the cleats correctly on your shoes.
- Marker: A marker will help you mark the correct position for the cleats on your shoes.
- Grease: It’s always a good idea to use a bit of grease on the bolts to prevent rust and ensure easy removal in the future.
How To Install Cleats On Bike Shoes?
Step 1: Mark the position across the ball of your foot
The first step to installing your cleats is to figure out where to place them on your shoe. To do this, sit down and put your foot on the paper.
Trace around your foot, then draw a line straight across the ball of your foot. This line should be parallel to the ground and perpendicular to your big toe. This line will serve as a reference point for the next step.
Step 2: Draw between the points and find the midpoint
Next, draw a line between the two points where your cleats will attach to your shoe. This will vary depending on the brand and type of cleats, but most will have two holes for the screws that connect them to your shoe.
Once you’ve drawn this line, find the midpoint between the two holes. This is where the center of your cleat will sit.
Step 3: Locate the center of your cleat
Now that you’ve found the midpoint between the two holes, you need to locate the center of your cleat. Most cleats will have a small dot or arrow indicating the center point, so use this to mark your shoe.
Double-check that this mark matches the line you drew in Step 1.
Step 4: Grease the bolts
Before you attach your cleats to your shoes, putting a little bit of grease on the bolts is a good idea.
This will make it easier to tighten and loosen the bolts in the future and help prevent them from rusting. Use a small amount of grease on each bolt, then wipe away any excess.
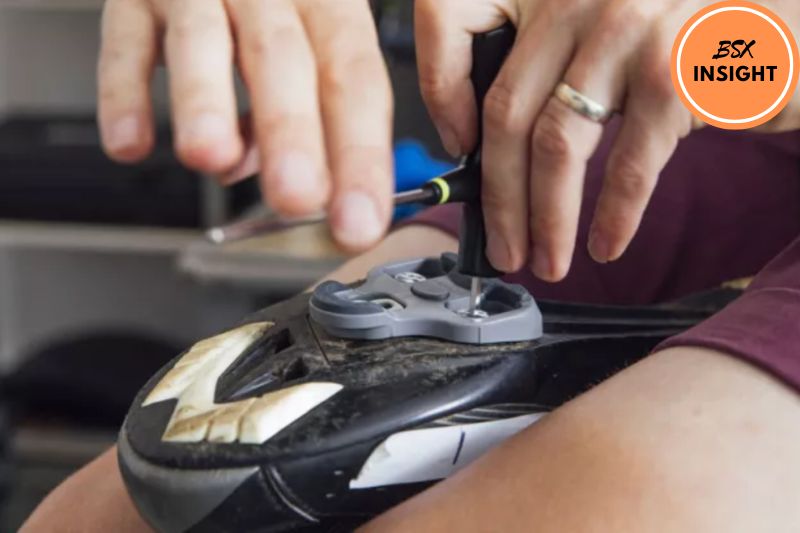
Step 5: Rotation

Now it’s time to attach your cleats to your shoes. Place the cleat over the mark you made in Step 3, ensuring the center point is lined up with the line you drew in Step 1. Tighten the bolts until they’re snug but not overly tight.
One important thing to keep in mind when installing your cleats is the rotation angle. The rotation angle refers to the angle at which your foot can pivot while it’s clipped into the pedal.
This can have a significant impact on your comfort and efficiency while cycling. Sit on your bike and clip into your pedals to find the right rotation angle.
Look down at your feet and see how your toes naturally point. Some people naturally point their toes slightly inward, while others point them slightly outward.
Adjust the angle of your cleats to match this natural angle – this will help prevent knee pain and make your pedal stroke more efficient.
Step 6: Tighten up
Once you’ve found the right rotation angle for your cleats, tighten the bolts. Use a torque wrench if you have one, as over-tightening can damage your shoes or cleats.
Check the tightness of your bolts every few rides to ensure they haven’t loosened up over time.
Tips To Maintain Your Bike Shoes?
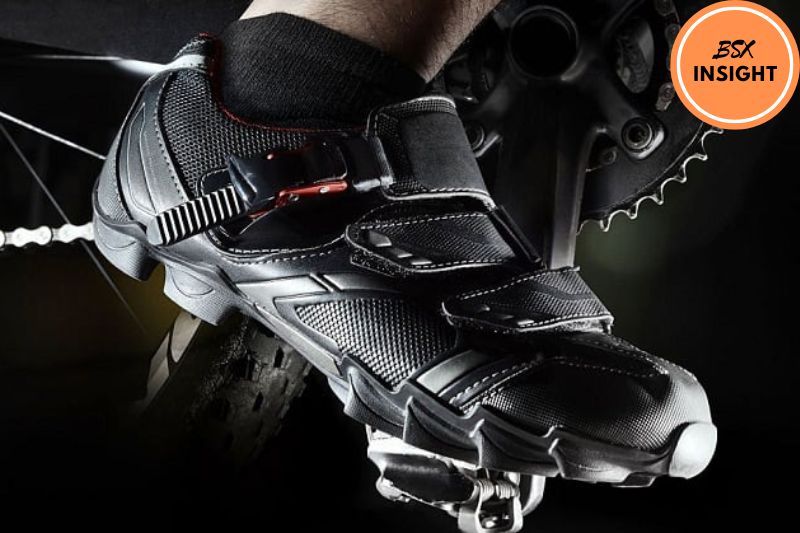
Bike shoes are essential to any cyclist’s gear, and proper maintenance can help prolong their lifespan and improve their performance. Here are some tips to help you maintain your bike shoes:
- Keep them clean: Dirt and grime can accumulate on your shoes over time, and this can cause them to deteriorate faster. Use a soft brush and mild soap to clean your shoes regularly, and dry them thoroughly after washing them.
- Store them properly: When not using your bike shoes, store them in a cool, dry place. Avoid leaving them in direct sunlight or near a heat source, as this can cause the materials to warp or crack.
- Replace worn-out cleats: The cleats on your bike shoes will wear out over time, and it’s crucial to replace them when they show signs of wear. This can help prevent injury and improve your performance on the bike.
- Check the bolts: The bolts that attach your cleats to your shoes can come loose over time, so it’s essential to check them regularly and tighten them if necessary. Use a torque wrench to ensure the bolts are drawn to the correct specification.
- Inspect the sole: The sole of your bike shoes can also wear out over time, especially if you walk in them frequently. Inspect the sole regularly for signs of wear, and replace them if necessary.
- Use a shoe cover: Riding in wet or muddy conditions can help protect your shoes from damage and keep them clean. Look for a cover that fits snugly over your shoe and has a durable material that can withstand the elements.
- Don’t over-tighten: When tightening the straps or laces on your bike shoes, be careful not to over-tighten them. This can cause discomfort and even lead to injury over time.
FAQs
What tools do I need to install cleats on my bike shoes?
You will need a 4mm hex wrench, a torque wrench, and some grease to install cleats on your bike shoes.
How do I determine the right position for the cleats on my bike shoes?
The ideal position for your cleats will depend on your riding style and biomechanics. However, a good starting point is to mark the position across the ball of your foot, draw between the points, and find the midpoint.
Should I use cleat shims when installing my cleats on my bike shoes?
Cleat shims can be helpful if you need to adjust the angle of your cleats. However, they are not always necessary, and it’s important to ensure that your cleats are secure and properly aligned.
How tight should I tighten the bolts on my cleats when installing them on my bike shoes?
It’s important to tighten the bolts on your cleats to the correct torque specification, which can vary depending on your shoes and pedals. Check the manufacturer’s instructions for the recommended torque value.
How do I prevent my cleats from coming loose after installing them on my bike shoes?
Use a torque wrench to tighten the bolts to the correct specification to prevent your cleats from coming loose.
You can also use a small amount of thread-locking compound to help keep the bolts in place.
Can I install cleats on any bike shoes?
Cleats can generally be installed on most bike shoes as long as they have a compatible mounting pattern. However, some shoes may not be designed with cleats, so it’s important to check the manufacturer’s specifications before installing them.
Do I need to adjust the rotation of my cleats when installing them on my bike shoes?
The rotation of your cleats can affect your pedal stroke and power output, so it’s important to adjust them to the correct angle. Experiment with different rotation angles until you find the position that feels most comfortable and efficient for you.
Conclusion
Installing cleats on your bike shoes may seem intimidating initially, but it can be straightforward with the right tools and a little patience.
If you follow the step-by-step steps in this piece, you should be able to put cleats on your bike shoes and make the most of your cycling experience.
Remember to take your time and double-check your work. If you have trouble, don’t be afraid to ask for help from a professional.
With adequately installed cleats, you’ll enjoy a more secure, efficient, and comfortable ride and take your cycling to the next level. Happy riding!