It is often advised that bike enthusiasts like myself master a few basic skills that may be helpful. You may save money on bike repairs and maintenance by learning simple skills like replacing or tightening a bike chain, changing a tire, or taking apart a crankset.
Nobody is ever born prepared for the career of their choice. Before being able to treat a patient, a doctor must complete years of education. Fortunately, changing a bike crankset isn’t as difficult to master as relocating the human body.
You’ll be fully prepared and able to move at any time with our guide on how to remove bike crank.
What Is A Crank Puller?
A tool used to take out a bicycle crank is called a crank puller tool. It functions by drawing the crank away from the engaged axle and is made up of a number of nuts and bolts.
Due to its reduced weight and more reliable performance, aluminum is typically used to make these cranks and bolts.
Bike Crank Removal Tool
You can use various materials even without pullers to take the bicycle cranks off your bike. I have listed all the supplies you require below.
Old rags
If you don’t have any old rags, you can use wipes or a soft, damp towel.
Screwdriver Allen Keys
Allen keys are required to easily access various machines. If you don’t already have one, you can get an Amazon Basics Allen Wrench Set.
Spindle Driver
Nuts and bolts for your bicycle’s cranks
For this, you’ll need a variety of nuts in both little and large sizes. I suggest utilizing Park Tool’s CCP 22 to loosen this bolt size for smaller ones (M8). On the other side, larger diameters like M14 and M12 can be used with CCP 44.
Bike Rack (Optional)
A bike stand is unnecessary, but I still advise using one because it straightens your bike while you’re doing it, giving you a favorable angle.
How To Remove Bike Crank Without Puller
In order to remove bicycle cranks without a puller, carefully follow these steps:
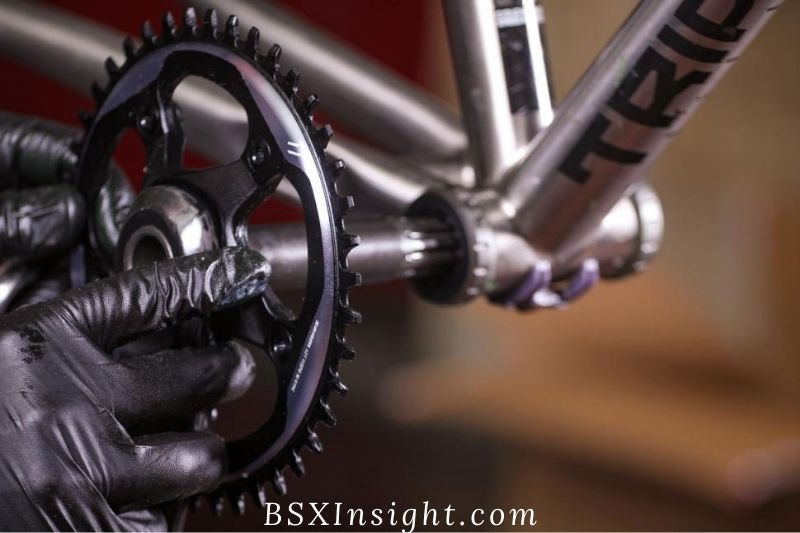
Step 1: Put On Gloves To Protect Yourself In The First Step
Remove the Safety Tab and clean the components.
Your safety should be your primary priority. I therefore strongly advise wearing gloves whenever performing any risky mechanical work. Even better if you have rubber mitts. When compared to other gloves, they offer additional protection.
Your hands are more vulnerable to wounds and injuries if you expose them. So make sure your hands are protected before beginning any job.
The first stage is more important than it may first appear because the bicycle’s chainring composition is the primary cause of bike crank damage. This bike component is incredibly sharp. Before you begin popping the safety tab, clean the area with the old rag.
After cleaning, use a screwdriver to remove the security or safety tab. Typically, a safety tab is composed of plastic. To avoid permanently damaging that part, you must be cautious when popping it out.
Step 2: Remove the Bike Crank Nuts or Bolts
Your alley keys or a universal wrench will come in for this phase. To loosen and separate all the bolts, spin and twist them counterclockwise. It’s time to remove the crankset once the bolts are unfastened.
Step 3: Take Out Each Washer
Now that the crank bolts have been taken off, it’s time to use a spanner to separate the washers.
What precisely is a washer, then?
Straight discs called washers keep the bolts and nuts tight. On a crankset, you can typically find these underneath the nuts.
They may have center holes and different designs, but they all serve the same purpose—helping your bike’s wheels move in one direction.
Once the washers have been successfully removed, store them somewhere secure.
Step 4: Locate The Crank and Turn The Coupler
When recognizing and removing cranks, you will utilize particular crank screws and nuts. Your bike’s bolts and nuts come in a variety of sizes, as I already said. To prevent breaking your bike, you must select the right tools and be aware of their size.
To reiterate, a CCP 22 or CPW 7 should be used for smaller cranks like M8 bolts, while a CCP 44 should be used for bigger cranks like M14 or M12 crank bolts.
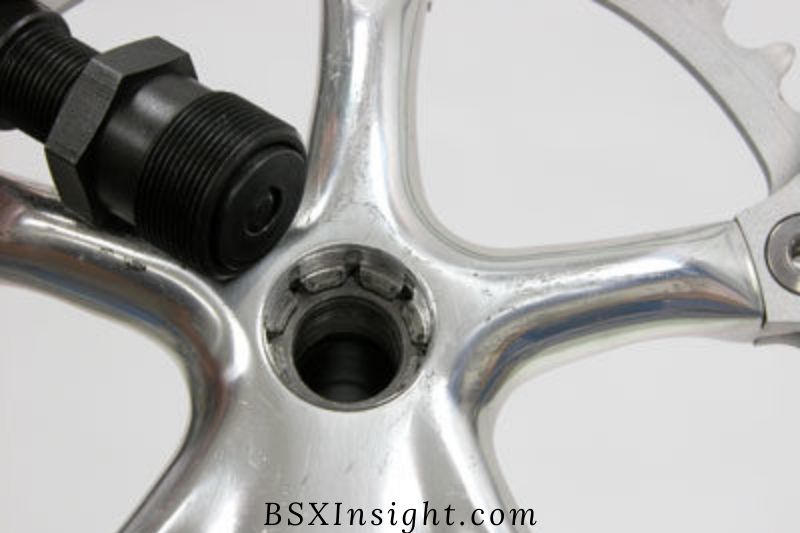
It’s time to remove the coupler with threading if you’ve already determined your optimum crank. For this stage, I strongly advise you to use one hex tool together with a screwdriver or a spanner.
Once you have the appropriate tools, slowly turn and twist the coupler until it is released. See if you can quickly reposition the hex. Avoid completely removing the coupler to avoid scratching or damaging the surface.
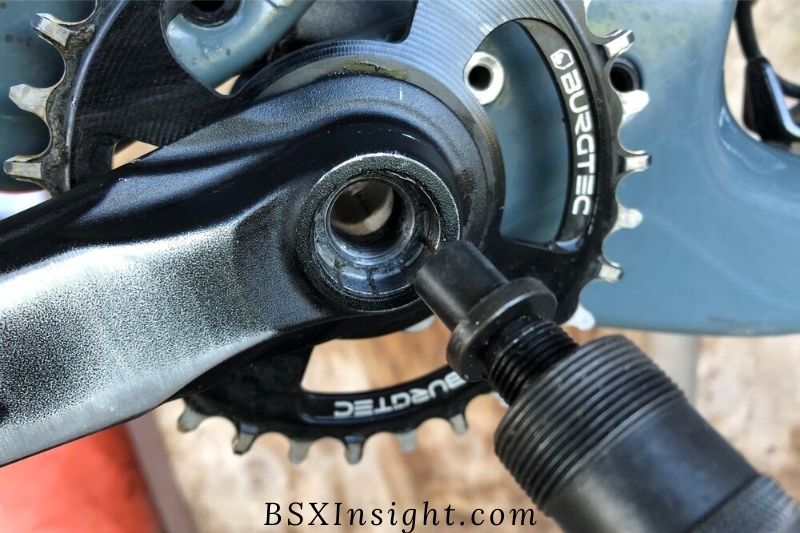
Step 5: Fit the Puller’s Spindle Driver Into the Crank Arms of the Bike
Using your bear arms, carefully attach the spindle driver of the puller to the bike arms. Put the spindle in the designated slot that is open.
The spindle should then be turned in the opposite direction. This phase calls for patience because you will be working slowly but steadily through it until you see the result is perfectly rigid and secure.
For maximum safety, you must perform a comprehensive stiffness analysis after completing this step. When you ride a bike, one shaky driver can cause collisions.
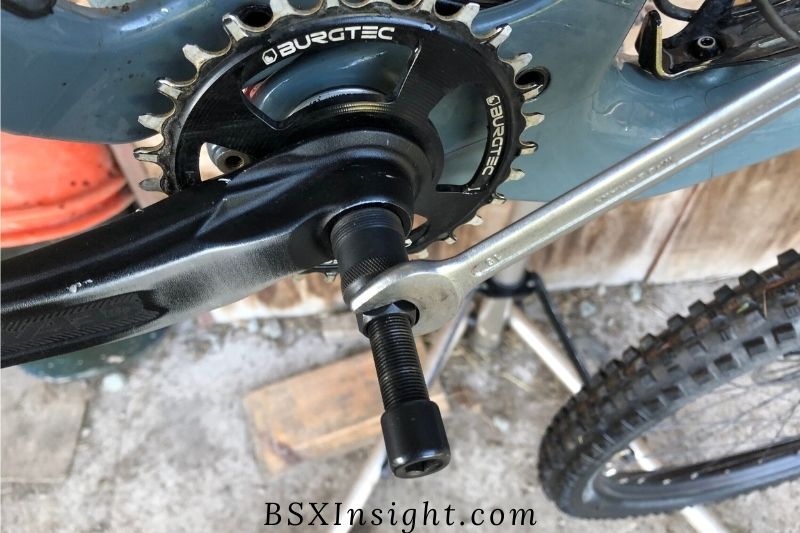
Step 6: Set the Driver Spindle’s Clockwise Direction
It’s time to turn the driver clockwise at this point. Continue threading the spindle until you saw that the crank was entirely released in order for this to be achievable.
Similar amounts of patience are needed for this stage as for the prior one. The technique should be carried out carefully and slowly because hurrying could damage your crankset as well as yourself.
I strongly advise placing the crank next to you, over an old newspaper, so you can refer to it more conveniently and in-depth. You must also keep in mind that this method will put your limb strength to the test, so if the bike part is too heavy for you, assistance may be necessary.
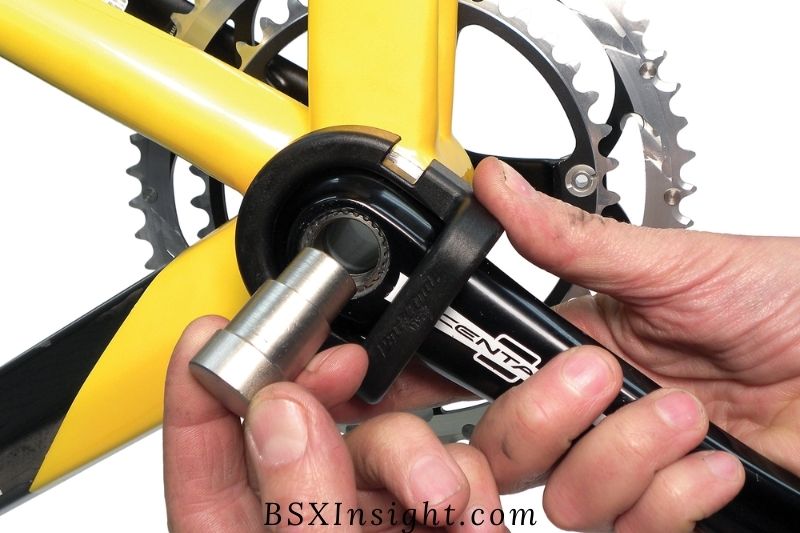
Step 7: Take The Puller Tool’s Thread From The Bicycle Crank

Remove the puller tool’s thread with caution from the bike crank. Only because the crankset was immediately removed are you able to do this.
If you don’t want to skin your knuckles separating the tools, you must be careful when performing this procedure. Your skin and possibly the rest of your body could become damaged as a result of this process.
Step 8: Apply The Same Techniques To The Opposite Side
I want to congratulate you on removing the first bike crank successfully. You just need to follow the same procedure to remove the second crank from the other component.
I must underscore that you must proceed with great caution at all times, especially if you don’t want to find yourself in an uncomfortable situation.
Asking for help is a smart move when performing this approach. You can manage the weights of the bike pieces with the aid of an extra arm.
You can avoid any further issues that may arise by keeping an eye on your safety during the entire process.
Step 9: Conduct A Thorough Bike Inspection
Maintaining the habit of double-checking is a good idea. I urge you to test and inspect your bike as the last step. Make sure that every component is successfully removed, notably the bike’s crank.
When issues arise, performing a double check enables you to identify the underlying cause and look into the problematic components. You can resolve the current problem in this manner.
Read our post on your bike chain getting in trouble: how to fix a bike chain
How To Remove A Bike Crank Arm Using Puller?
Step 1: Using a socket wrench, loosen and remove the crank nut as well as the washers. If your crankset has a dust cap, you might need to remove it.
Step 2: Completely tighten the threaded crank puller after inserting it.
Step 3: You will experience resistance when you turn the bolt into the crank puller. The crank will loosen as a result.
Step 4: The crank puller is unscrewed. Next, repeat for the opposite crank arm.
How To Install A Bike Crank?

Step 1
Immediately insert the proper crank into the spindle. Before attaching the spindle, you can also wrap the washers around it.
Next, insert the right side of the crankset into the right spindle, and then wrap the chain around the chainring. Make sure the crankset is securely attached.
Step 2
Gently insert the left crank into the spindle. With a rubber mallet, carefully tap the left crank arm into the spindle after which you pushed it there.
Step 3
Using an Allen key tool, securely tighten the crank into the socket. Reinstall the crank bolts in the appropriate sockets. Then, tighten the crank bolt.
Step 4
Verify the pinch bolts are tightened and check the compression cap again.
Using a torque wrench, tighten the cap and bolt to the specified torque. typically 5 Newton meters. Then, torque your crank and bolt to around 15 Newton meters.
Step 5
The crank arms are secured by the pedals. Each socket should have a pedal on it. Rotate the pedal counterclockwise. On the other side, repeat the procedure. After that, check all the nuts and bolts once more.
Watch this video to get in-depth the process of removing bike pedal arms
Is Crank Pullers Universal?
With crank pullers, there is no difference between road and mountain. M22x1 extractor threads have been used for a long time on the vast majority of cranks.
There are a few older sizes of cranks made by T/A, Stronglight, and maybe even some less well-known ones that all need their own extractors.
But you can use The CWP-7, which is a universal tool that can remove crank arms from 3-piece bicycle crank systems with both square taper and splined threads. The rotating tip, which may be adjusted, smoothly and securely moves the crank arm away from the bottom bracket spindle.
The exceptionally fine threads allow even the most difficult cranks to be removed. The CWP-7 requires a replaceable wrench. It is only not made to take off Cannondale hollowgram cranks.
Best Crank Pullers Available
Oumers Bike Crank Extractor
Can be compatible with any brand or style of bottom bracket.
The high quality of this bike crank extractor/puller prevents any harm to the BB’s teeth, and it fits cranks with 20 teeth. This bottom bracket is compatible with any Standard Square Tapered crankset and any bottom bracket with 20 splined teeth.
To remove the bottom bracket from a bicycle, you’ll need a 24mm socket, wrench, or adjustable spanner, all of which are included with the tool.
BIKEHAND 17 Piece Bike Bicycle Repair Tool
Patch kit for flat tires. Combination Phillips/flat head screwdriver. Ejector for audio cassettes (Shimano compatible).
A little screwdriver (for adjusting the derailleur). Open-ended wrench, 8x10mm, made of forged steel.
Matykit 7Pcs Bike Tools
In order to remove cassettes from their hubs, this tool is intended to be used in conjunction with the cassette lock ring tool. The tool that is used to remove sprockets can also be used to tighten screw-on freewheels. Cassettes of 7, 8, 9, and 10 speeds can be accommodated.
FAQs
What Is The Difference Between 172.5 And 175 Cranks?
A 172.5 and a 175 crank differ from one another in length. A 175mm crank has a length of 175mm, while a 172.5mm crank has a length of 172.5mm.
Does Crank Length on a Bike Matter?
It is true that a bicycle’s crank length matters. Better pedaling efficiency results from a longer crank because energy is carried more effectively throughout the crank.
However, the likelihood of pedal strikes is higher. Bicycle terminology refers to “pedal strikes,” which occur when your cranks’ tips unintentionally strike objects like rocks or the ground and cause scratches or dents.
How Long Should My Cranks Be?
Depending on the type of biking you do, your crank length should be. The best crank arms to use when biking downhill are shorter ones.
Downhill bikes typically have crank arms that are 165mm long, as in the case of the Shimano Saint.
Choose 170mm cranks if you ride enduro because they are the perfect length—neither too long nor too short. Pedal strikes are avoidable while still pedaling effectively.
Crank lengths on cross-country and road cycles range from 170mm to 175mm to allow for efficient pedaling and the knowledge that they don’t frequently ride on difficult terrain.
What Does A Crank Puller Do?
A crank puller is a tool used to remove bicycle cranks from the wheels. They are used on the
two types of cranks that are most frequently used: cranks with square spindles and cranks with splines.
If the spindle end is no longer correctly recessed in the crank hole, you can use crank pullers.
This is crucial, especially if the crank bolt isn’t exerting enough force to hold the arm inside the spindle.
In other words, you must use a crank puller to remove it because the crank is already worn out.
Conclusion
As previously said, taking out a crankset is not too difficult and typically only takes a few minutes. Make sure to regularly clean your bike and the other parts to prevent the accumulation of dirt and grime. Additionally, always wash your bike off with water after each ride. Never spray water directly at the bearings or use a spray pistol.